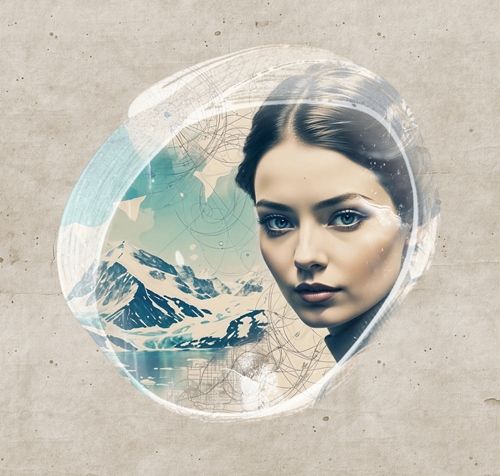
Unique Mask
If you’ve been following me for any length of time, it should be obvious that I use clipping masks A LOT😉 I’ve talked about masks in what seems like countless posts. The most recent one was just a few weeks ago – “Built In Caption”.
So, it’s kind of funny that there’s one type of mask in particular that I’d pretty much forgotten. I suppose that just goes to prove the old adage…

Today I want to share a little gem that I discovered quite some time ago and absolutely fell in love with. Just recently I stumbled across one and was reminded how much I loved them. They’re my renewed favorite (for now) element. I suddenly find myself trying to use them more on my personal layouts.
In this post I’m going to show you a mask that you don’t see very often any more. But they are so versatile and fun. They can add a very unique component to your masking…
Two-Tone Mask

Perhaps you aren’t sure what a two-tone mask is. I know I didn’t realize exactly what they were the first time I saw them. And I certainly didn’t use it correctly until I ran across someone that could explain them to me. And honestly, I can’t imagine how I ever forgot these?!?!
Most often a two-tone mask is done in black & white as the image above shows.
A two-tone mask adds texture, lines and sometimes a vintage look to photos, papers or even elements. But it requires a different Blend Mode when used in Photoshop Elements (PSE). It’s a very quick and easy change to make. So, let’s play around with one today…
Exploit The Dual Tones
Quick reminder…I use PSE 2024. If you’re using a different version, some of my screen shots may look different from what you see on your screen.
As usual I’m going to start with a 12×12 file and drag in a nice background paper:

I know that’s a pretty fancy piece of background paper. But I’ve got a layout design already in progress.
Note: While demonstrating today’s technique I’ll be using products from “New Journey: January” by CarolW Designs.
Next, I’ll drag in my desired photo:

Note: This photo is from Pixabay.
I then bring in my two-tone mask:

Note: This mask is from “You Are Worthy” by The Urban Fairy (currently not available).
You should be able to easily see that this mask has white as well as the “standard” black.
Now I’ll place the mask layer beneath the photo and clip the photo to the mask:

Notice that there isn’t any of the white showing. That’s because PSE clips the photo to the entire mask regardless of color. Now, there’s nothing wrong with using the mask just this way. But it seems a shame to lose the visibility and enhanced effect of the white portion. So, how am I going to get the white to show up? Easy…
If I duplicate the mask, place the copy above the photo and change the Blend Mode from normal to Screen, I have this:

Now I have a very nice frame effect on my photo using that same mask!
So, you may be wondering why only the white shows. Actually, this is something I touched on in my “Glow Getter” post back on October 29, 2024 when I was working with the PSE Inner Glow Layer Style.
Anytime the Blend Mode is set to Screen, the blending cancels out anything that is black. That means with the mask I used the black does not show up at all leaving only the white.

That sounds like a fun little magic trick to place in your “back pocket” if you need to get rid of black some other time 😉 Just kidding…probably not a trick that would have large scale use. But still good to know!
Anyway, from here there are other things I can do. I can play with the blending and/or opacity to change the look. Blend Modes of Lighten, Overlay, Soft Light and Difference can provide interesting results (depending on the photo). I’d encourage you to also play with both the Blend Mode and the Opacity to see what you can achieve.
I’m pretty happy with the way this looks so I’m going to stick with the blending at Screen.
I did go on to finish my layout before completing this post. Thought I’d go ahead and share it here for you:

You can see more details about this layout in my 2025 Gallery.
One quick point here…two-tone masks don’t always have to be black and white. You can get a two-tone effect like I’ve shown using colors other than white. Again, the results will vary based on the photo.
Let’s take a look at a different mask:

This is a mask of my own creation (also shown at the top of the Two Tone Mask section). If you don’t already have a two-tone mask of your own, you can click on that mask above and it will immediately download for you.
And here it is pulled into my 12×12 file with a background:

I put a bold solid background behind the mask so I would be sure to see all of the white. If you look closely, you might be able to see that there are a few spots of light white along the top of the mask. I’ll zoom in for you just in case you can’t see them on your screen:

Without that bold background…I may have missed these spots during the recoloring process.
Since the white on that mask looks like water splashing, I’m going to change it to shade of blue (#0f78ee). Before I can recolor the mask, I need to simplify the layer. If you read my “Built-In Caption” post a few weeks ago you already know why I need to do that.
The next thing I want to do is lock the transparent pixels. This is something I discussed in my “All About The Mask” post back on October 24, 2023. In case you missed that, here’s a refresher.
There’s a little icon at the top of the Layers panel that you may or may not have ever noticed. Its name is actually “Lock transparent pixels”:

With the mask layer active (& simplified), I click this icon. You always want to be certain that the mask layer has this little icon displayed off to the right in the Layers Panel before you recolor:

Now, using the Paint Bucket Tool and the blue color I mentioned above, I can now recolor the white portion of the mask. All I have to do is place my cursor somewhere in the white portion and click once. And the white becomes blue:

And you should be able to see that even those spots across the top of the mask did get recolored!
Now I’m going to bring in a photo so you can see how this new colored mask will work. I’m going to use this beach photo from Pixabay:

I drag the photo into my file, layering it above the mask and clip the photo to it:

Then just as before, I duplicate the mask, move the duplicate above the photo and set the Blend Mode for that new layer to Screen:

That’s nice. But I’m going to play with the blend options. Lighten, Color Dodge, Linear Dodge, Overlay and Soft Light each had interesting results. I was torn between Linear Dodge:

And the Overlay blend:

That could almost pass for a sunset or dusk photo!
The Hue & Color Blend modes produced a rather unexpected surprise. Hue gave this result:

Using the Color blend, I got this:

I’m fairly certain you never imagined that a two-tone mask could provide a multitude of options.
Do keep in mind that blend results will vary from photo to photo so don’t be surprised if things look different with your own photos.
One final option. I went back to the version using Linear Dodge and added a standard PSE Bevel of Simple Emboss:

Clearly this is something that may not work with every mask or in every application. But it’s worth giving it a try.
Create Your Own Two-Tone Mask
Making your own two-tone mask isn’t any harder than creating your own regular mask. If you’ve never done that, please refer back to that “All About The Mask” post I mentioned above.
The biggest difference between what I showed in that post versus what I’ll show you now is that with this mask, part of it will be white.
I’m going to go back to that bold solid color (green) background I used above. It’ll just make it easier to see the white when I add it. And I pull in another mask of my own creation:

Note: If you’re following along, you can use any mask you like.
Next, I’m going to grab a stamp from “Metamorphosis Stamps” by Karen Schulz Designs (retired). If you have read my “All About the Mask” post, this stamp should look very familiar to you:

I have to admit this is one of my favorite stamps. But for today, I am going to make one modification. I really don’t want the text that you can see. But that’s easy enough to delete with the Eraser tool. So that won’t be a big deal.
Note: If you’re following along, you can use any stamp you like.
I just drag the stamp into my file layering it above my mask, I then hide the mask layer. Now, as should be no surprise at this point, I need to simplify this stamp before I can erase the text I don’t need. After deleting the text and cleaning up some other spots around the text I have this:

Before I can recolor the stamp, I need to lock the transparent pixels just as I did with the white part of the mask in the previous example. Then, l set my foreground color chip to white. Using the paint bucket tool, I place my cursor in a part of the stamp that looks to be solid black and click once:

Now I do want to point out one thing here. Since I had removed the “text” portion of the stamp I could have just “inverted” the stamp (press Ctrl+I). That too would have changed it to white.
But inverting may not work on all black masks because there are varying shades of black/grey that may not result in white. Therefore, most times it’s safer to recolor a stamp rather than inverting it.
Note: If you’re following along, you can use any color you like for your stamp.
I can now unhide my mask and re-position/resize the stamp as necessary. Once I started positioning the stamp I did end up removing another section of the stamp that just wasn’t working with this mask. And here is my final result:

Now to complete the two-tone mask. First, I’m going to duplicate the mask & stamp layers (you should know by now I’m overly cautious before make a “destructive” move). With the duplicate layers active I merge the mask & stamp into a single layer. I then remove the background color and save this as a PNG file:

And you probably know I also saved this as a PSD file…”just in case” 😉
I can now use this two-tone mask just as I have with all the others. I’m going to grab a spring flower photo from Pixabay:

All I have to do is follow the same steps I’ve already shown you and here is a nice example using the Screen blending on a lighter background:

I hope you can see how easy it is to make your own two-tone mask. And you don’t have to limit yourself to using stamps for the “white” part. You can use text, or even brushes (similar to what you can see in the featured image at the very top of this post).
I hope you’ll play around with two-tone masks even if you don’t create your own. I think you’ll find they’re a unique and lovely addition to the masking arsenal.
More Two-Tone Tips

The most important thing to keep in mind is that this technique only works when your mask has some color in addition to the black.
You can use the mask as a “simple” clipping mask if you don’t really care to have the white (or other color) visible. Nothing says you always have to take the extra step to include the white.
When creating your own two-tone mask experiment with using brushes, word art stamps or text of your own for the “white” portion(s). You don’t always have to use a decorative stamp.
Colors other than white will also work as the second color. Just about anything other than black will work!!!
Don’t forget to play with other Blend Modes and Opacity levels to see how your two-tone mask changes.
Remember…a clipping mask can be used on more than just a photo!
Thanks for reading this week’s Tuesday Tip. Remember, if you have any suggestions or questions please don’t hesitate to “Message Me“. Check back next week with for a tip about another fun title trick. Click “Follow Me” to stay in touch. I hope you have a wonderful week!
