Centering
Last week’s post about using the Refine Edge tool got a bit long. So, today I thought I’d take it easy on you and give a quick tip about centering. Have you ever run into a situation where centering text or some other element on just a portion of a layout got tricky? By combining the power of a selection with the Move tool, you can get perfect placement every time.
Within A Selection
Just a quick reminder; I use PSE 2024. If you use a different version, some of my screen shots may look different from what you see on your screen.
For simplicity, today I’m going to open a fairly simple template I created years ago:
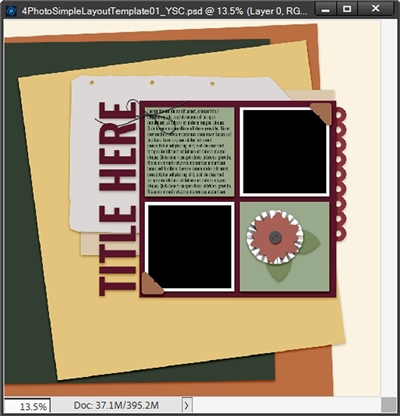
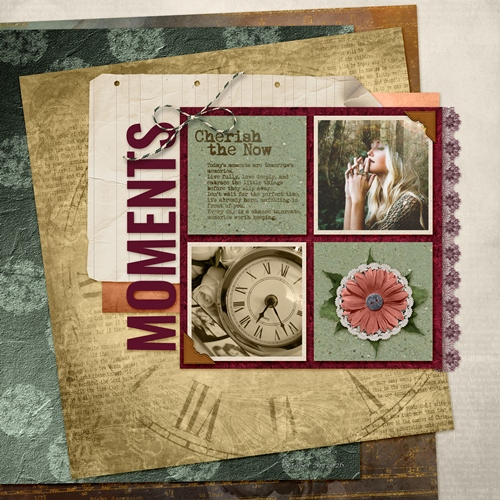
This template may look suspiciously familiar if you paid attention to the featured image at the top of this post 😉 That featured image is a layout I created using the above template. If you’d like more information about that layout, you can find it in my 2026 Gallery. The title of that layout is “Moments”.
And I have a little “gift” for you today. If you’d like to follow along you can use whatever similar project you may have in the works. Or you can click here and this template will automatically be downloaded for you!
As you can see there are two photo squares, a square with a flower element, and a square with a journaling text box.
Centering photos generally isn’t a problem. And in most cases, a text box typically won’t present much of a challenge when it comes to centering.
But let’s look at the flower cluster. No matter how you look at it, that cluster isn’t centered on that square. And I’ll confess; I did that on purpose!
Before I tackle that cluster, I’m going to open this piece of word art to use in place of the journaling (text box):
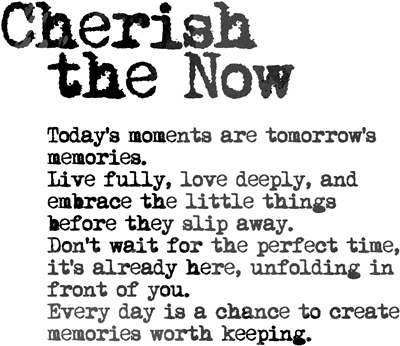
This word art is from “Daily Stories Inspirational Texts” by ET Designs.
Note: Because I don’t have a commercial license for that word art, I can’t give a copy of it to you. So, for purposes of following along, please use any piece of word art you have in your supplies.
I hide the journaling text box and pull that word art into my file:
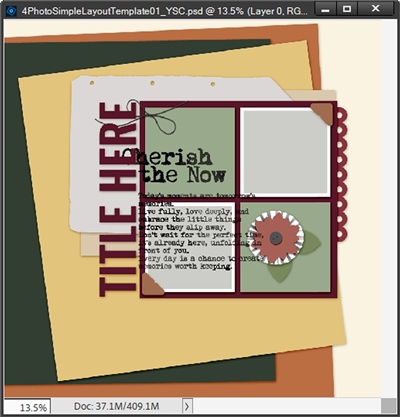
As you can see, the word art is too large to fit in the top left green square. So, I’m going to resize it until I feel like it’s small enough to fit there:
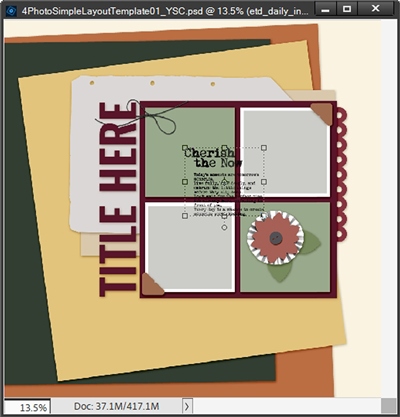
With the word art layer active in the Layers Panel, I’m going to zoom in closer so I can see that green square a bit better. Then I grab the Rectangular Marquee tool and draw a selection box around that upper left green square:
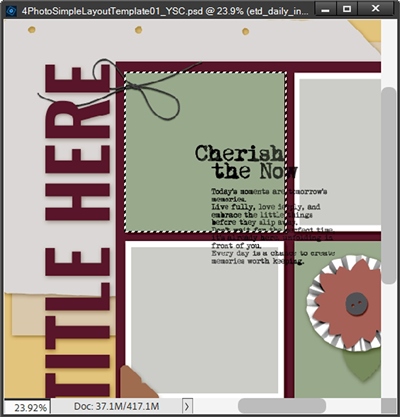
The trick here is to get that selection box to be as close as possible to exactly the same size as the green square. Mine looks pretty good so it should work out just fine.
Note: When you’re making a selection around a specific shape rather than a “general area”, there is an alternative to drawing a selection. You can just Ctrl-click the thumbnail of the shape to which the centering action be will be applied. This actually ensures the dimensions of the selection will be more precise.
Centering Via Move Tool
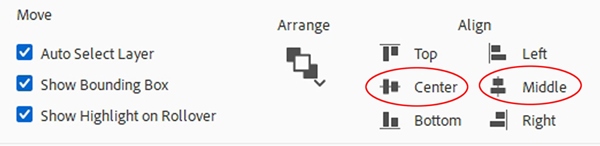
Ensuring that the word art layer is still active, I grab the Move tool (press V). In the Move tool options under Align, I click the Center and Middle icons:
PSE then centers that word art perfectly in that green square:
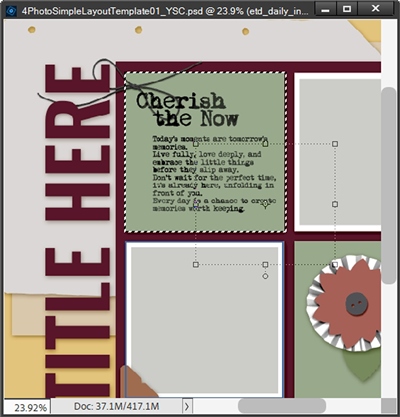
You may not have noticed something odd in that image directly above. Even though PSE moved the word art, the bounding box of that word art is still in the original position. This can generally seem confusing so I wanted to explain why this happens.
The bounding box belongs to the layer (not necessarily the image). When using the alignment buttons in the Move tool options, PSE aligns the whole layer to the active selection boundaries. The bounding box itself stays locked to the outer pixel dimensions of that layer. As soon as the selection is canceled (press Esc of Ctrl+D) the bounding box moves to the new location:
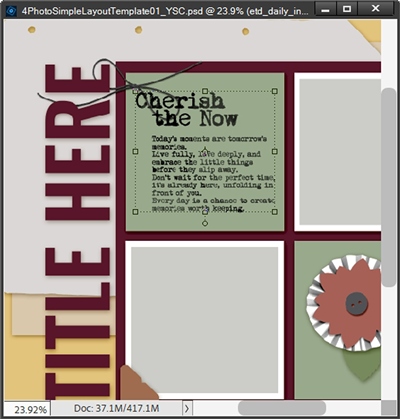
This looks more normal now.
Let’s tackle the cluster…
Centering A Cluster
If you’re using the template I provided, your Layers Panel should look something like this:
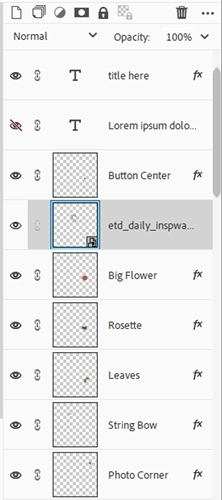
You can see that the word art layer is still the active layer. It may or may not be in the same exact location within your Layers Panel as mine, but that’s okay. I am going to move mine above that Button Center layer. You don’t have to move yours; but it will make things a little easier if you do.
I’m now going to select all but one of the layers that make up that cluster:
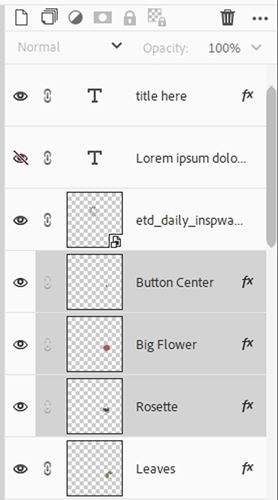
I specifically omitted the leaves for one reason. I’ll explain why in just a minute.
With the desired layers active, I create a selection around the lower green square. Just as before, I then click the Align Center and Middle icons in the Move tool options:
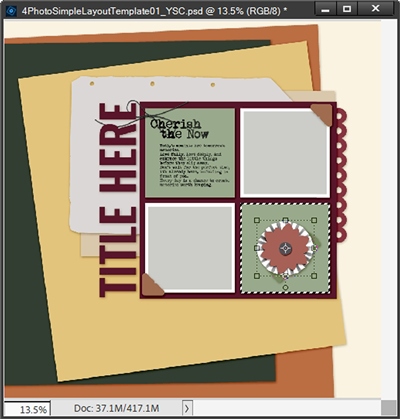
The first thing I want to point out is that this time, the bounding box moved with the images. Oddly enough, when using the Move tool to center multiple images within a selection in PSE, the bounding box moves (and frames) the active group of selected layers because the bounding box is hard-locked to the outer dimensions of the selected content’s pixels or layer boundaries.
The next thing I want to explain is why I didn’t include the leaves. Look closely, the leaves are barely visible around the right half of the Rosette layer. If I had included the leaves as part of the active group, this is what would have happened:
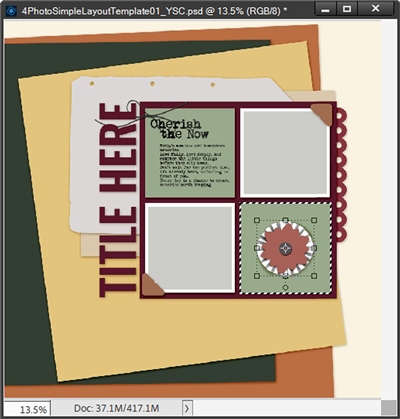
Now the leaves are completely hidden, centered beneath the rest of the cluster. So, I’m going to undo that version of the centering and go back to where the leaves at least peeked out:
I intended the flower/rosette combination to be centered in the green square. I can adjust the position of the leaves or remove them completely if it looks odd later.
Centering Over General Space
Up until now I’ve basically been centering something over a specific, confined space. I want to show that the process works exactly the same even if I’m not centering over a given shape.
So, I’m going to hide everything except the Tattered Paper, Layers 1-3 and the Background of the template:
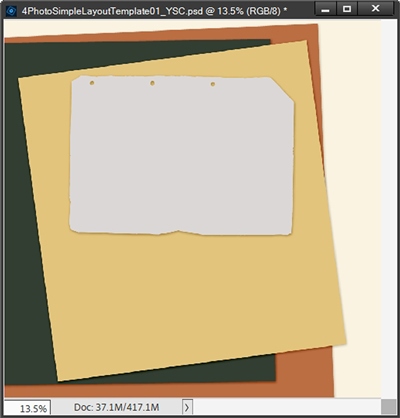
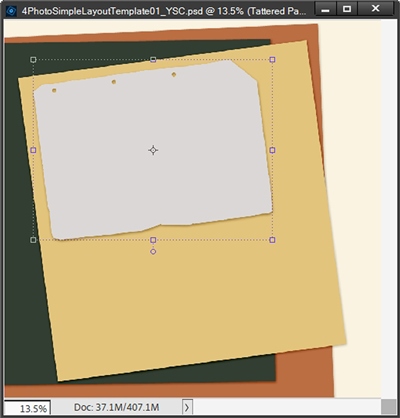
I’m going to free rotate the tattered paper so it lines up along the same angle as the gold paper:
Now I’ll unhide the cluster layers (except the leaves):
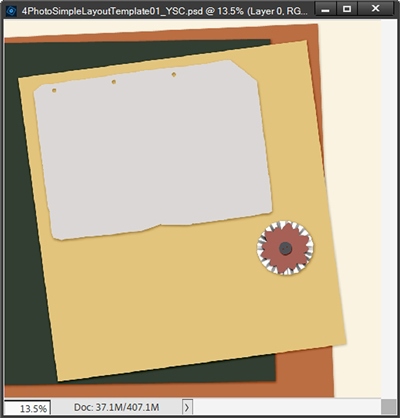
I want to center that cluster over the area between the top left corner of the gold and tattered paper. I select each of the cluster layers just as I did before. Then I draw a small selection around the corner of that paper:
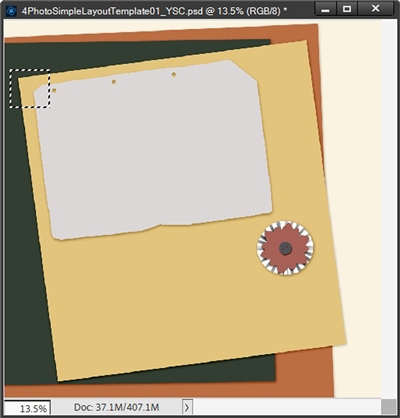
You see, it doesn’t even need to be a big selection. All I have to do is identify the location on which I want the cluster to be centered. Now I can click the Align Center and Middle icons to position that cluster:
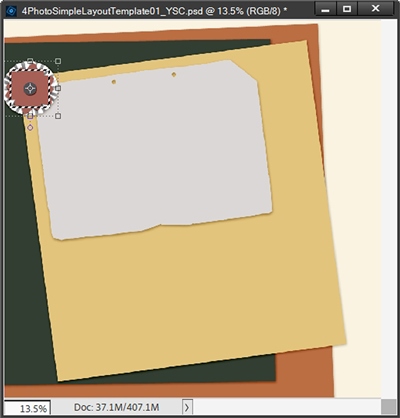
Could I just as easily have moved that cluster manually? Yes, this was a fairly basic centering action. But sometimes it’s not that easy and I wanted you to see that you don’t have to target a specific shape.
Centering Over Odd Selection
I’m going to go one step further to make my point. This time I’m going to unhide the Scallop Edge layer. In the layers Panel I will move that scallop to just below the tattered paper and make it the active layer in my Layers Panel.
Then I’ll use the Polygonal Lasso tool to make an odd shaped selection along the edge of that tattered paper:
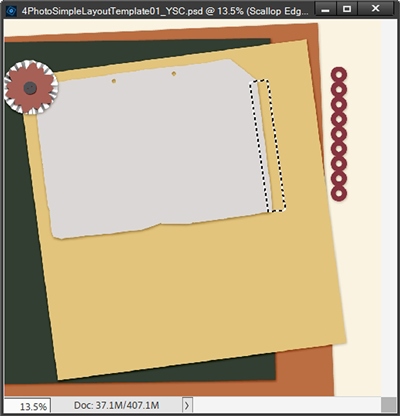
Now I just click the Align Center and Middle icons in the Move tool options:
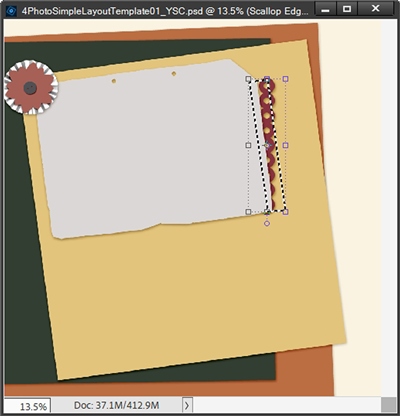
I know, it’s not aligned at the correct angle. But it is properly centered along the selected portion of the edge. It’s a simple matter to rotate the scallop so it matches the angle of the paper. But I must cancel the selection before I rotate the scallop:
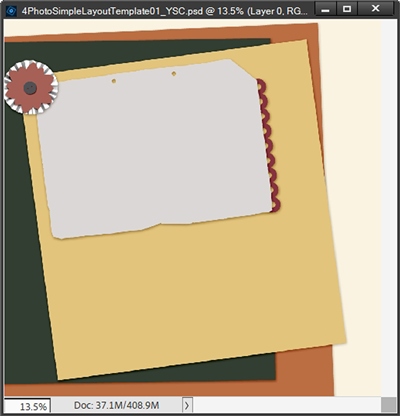
That was so much easier than manually moving the scallop, at least in my opinion.
Now one last quick example. I have another piece of word art that I want to center over that tattered paper. And you can see the selection I created:
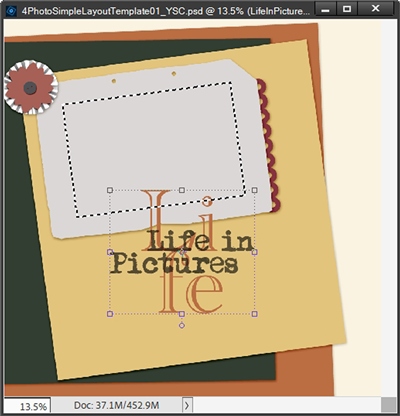
And here it is after centering and aligning it to match the angle of the paper:
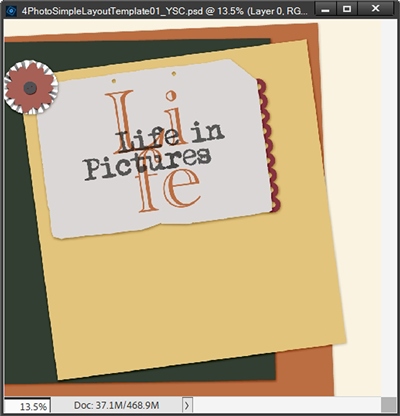
Could I have simply used Ctrl-click to make a selection around that tattered paper? Yes. But I was trying to point out that you can confine the selection to a specific portion of an element. In this particular case the selection was nearly centered. But I could just as easily have made the selection closer to one side or the other if I planned to add other elements to that “card”.
Hopefully, learning about how using the power of selections and the move tool can lead to perfect placement every time was helpful. I’d encourage you to play around with this new skill the next time you need to center something.
Simple Tips
You can use any selection tool that works for your given application. Or simply Ctrl-click on a layer’s thumbnail to create a selection outline of a given shape.
If you have multiple layers that need to move together into that centered spot, it is a good idea to link them together in the Layers Panel or “group” them first.
PSE only centers based on vertical and horizontal points. Sometimes after centering your image within a selection, you may still need to realign the angle of the image. When this happens be sure to cancel the selection before you start to move the centered image. Otherwise, PSE will move only the part of the image that remains within the selection
If your image looks off-center even after clicking the align buttons, the layer might contain invisible transparent pixels, loose brush strokes, or stray marks. Crop the layer, or clean up extra pixels around the edge so the bounding box matches the actual visual content.
If you need to position a selection box dead-center before dropping your image in, drag and snap vertical and horizontal 50% rulers/guides across the intended location. You can right-click within an active selection and choose Transform Selection to snap it cleanly to those center intersections.
Staying creatively centered is about protecting your inner focus, trusting your process, and tuning out the external noise so you can create from a place of authenticity.
Thanks for reading this week’s Tuesday Tip. Remember, if you have any suggestions or questions please don’t hesitate to “Message Me”. Check back next week for tips about word frames. Click “Follow Me” to stay in touch. I hope you have a wonderful week!