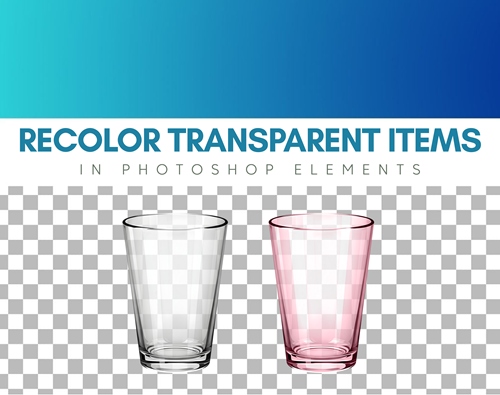
Recolor Glass
I know, I know…in last week’s post I mentioned that I’ve spent weeks this year (including last week) discussing the countless ways to recolor just about anything. I really think this might actually be my last coloring tip (fingers crossed). And I promise, today’s tip is about a really quick technique to recolor glass or other transparent (translucent) elements.
Transparent Color
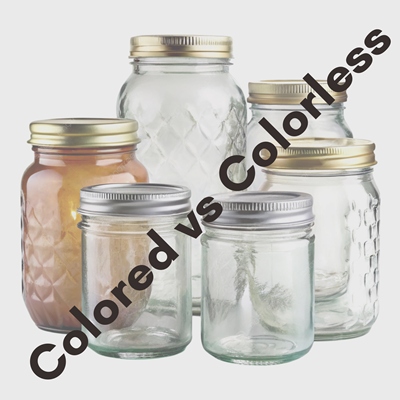
To recolor glass or other transparent or semi-transparent objects (like water, or even sheer fabric) in Photoshop Elements (PSE), you need to preserve the underlying highlights and shadows while changing the hue.
There are two different methods that can be used: Hue/Saturation Adjustment layer paired with a Blend Mode (Hue) or Solid Fill Adjustment layer paired with a Blend Mode (Color)
Choosing the most effective method will depend on whether or not the object is completely clear (no color) or already has a color. We’ll look at both options today!
Recolor Glass – Colorless
If my element is totally clear, similar to the glass in the featured image at the top of this post, I find using a Solid Fill Adjustment layer paired with a Blend Mode of Color usually is the easiest.
Just a quick reminder; I use PSE 2024. If you use a different version, some of my screen shots may look different from what you see on your screen.
I’m going to create a new 12×12 file with a white background and set my Foreground and Background color chips to the defaults (press D). I’ve pulled in a simple mason jar from my stash. I immediately duplicate the jar layer and hide the original (just in case).
Note: If you want to follow along feel free to use any transparent/translucent image you like.
And if you read last week’s post, you know I need to simplify that duplicate layer right away:
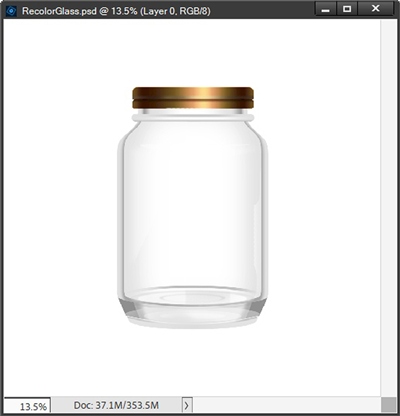
Now, if you followed my series about recoloring, specifically the Recolor – Part 2 post, you already know that sometimes recoloring entails selecting only a portion of an element to recolor. That is the case with this mason jar.
Clearly, I want to only recolor the glass; not the lid. So, I’m going to use the Quick Selection Tool (press A) to make a selection around just the lid:
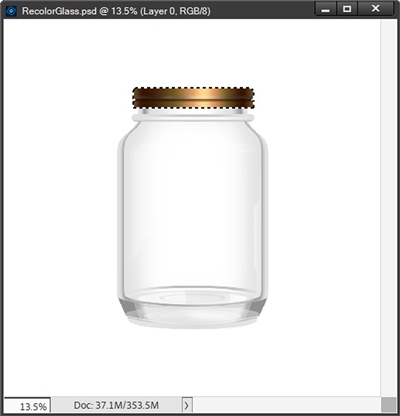
I press Ctrl-J to place a copy of the selection on to a new layer and I rename the new layer to Lid Only. PSE placed that new layer directly above my duplicate jar which is exactly where I want it to be.
I want my recolored jar to be sort of violet. So, I set my Foreground color chip to a shade of purple (#8b46d8).
With the duplicate jar layer active I Ctrl-Click the thumbnail of the layer to make a selection around the jar. I then click the Create New Fill or Adjustment Layer icon (the half-black, half-white circle) at the top of the Layers Panel and choose Solid Color.
PSE automatically converts the active selection into a layer mask, restricting the color to just that object. Don’t panic. Remember, I already made a copy of the lid so it won’t be recolored! Here’s how my Layers Panel looks now:
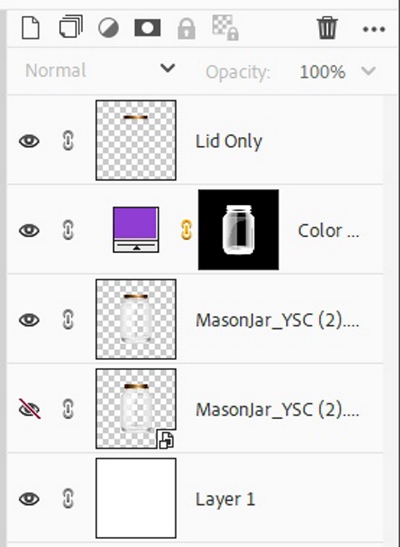
And here’s how the jar looks:
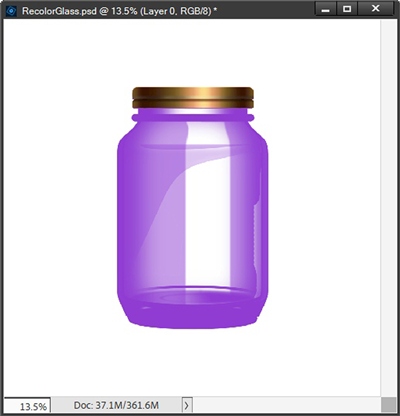
See…the lid is unscathed! Unfortunately, that jar’s not a very attractive color. But I did say this Solid Fill Adjustment would be paired with a Blend Mode, didn’t I?
I ensure that the Solid Fill Adjustment layer is active and I set the Blend Mode to Color and set the Opacity of the layer to 60%:
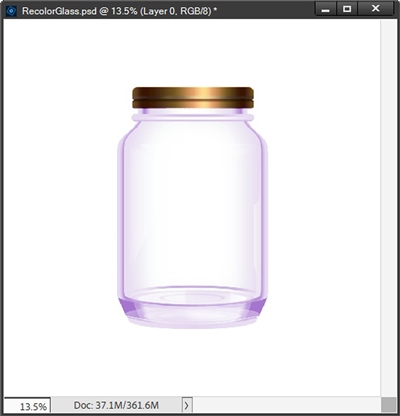
That looks so much better. So, that was a fairly easy way to recolor glass.
I’m going to place a very light wood background behind this jar so you can see that it kept its transparency:
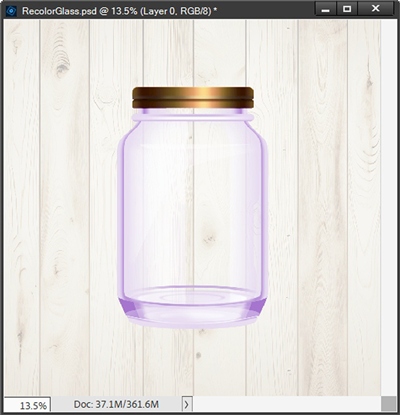
Okay, I confess…that’s not the only reason I put a wood background behind that jar. I have another mason jar that at first glance, appears to be at the very least, translucent. I want to show you how that mason jar turns out using this same method.
Recolor Pseudo-Colorless
Here’s my other mason jar:
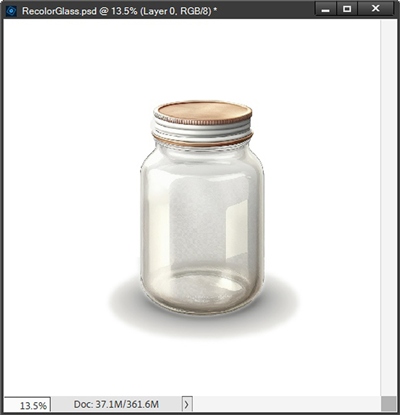
Just as before, I immediately duplicate the jar layer, rename the duplicate layer to Jar#2, hide the original and simplify the Jar#2 layer.
As you can see this jar has not only a lid but also a shadow, both of which I want to keep at their original color. And just as before, I want only to recolor the glass portion. So, I make selections around the lid and shadow areas:
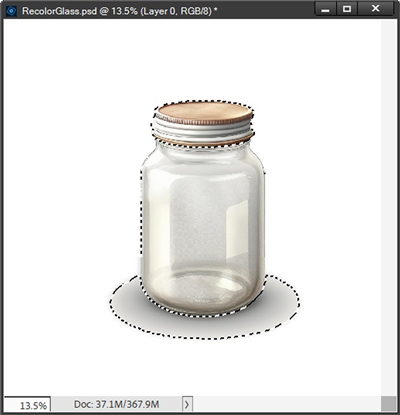
I press Ctrl-J to create a new layer from that selection. PSE places that new layer above the Jar#2 layer and I rename that layer to Lid & Shadow.
With the Jar#2 layer active I apply the Solid Fill adjustment layer and Blend Mode the same way I did above only this time using an aqua color (#00aeef) and an Opacity of 35%:
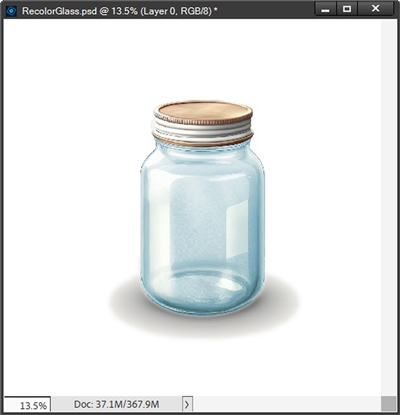
Right now, that looks okay. But when I put the wood behind it, turns out that the glass wasn’t even almost translucent:
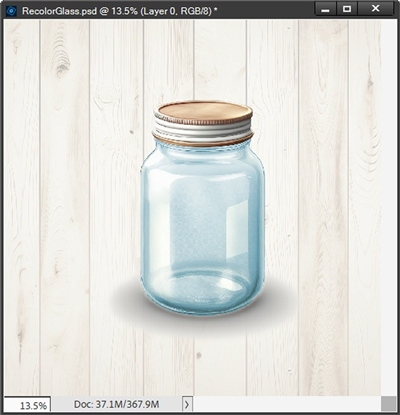
You should be able see that the woodgrain background is not visible beneath the glass. That doesn’t look very realistic, right?!? But there’s an incredibly easy fix for this. All I have to do is set the Blend Mode of the Jar#2 layer to Multiply:
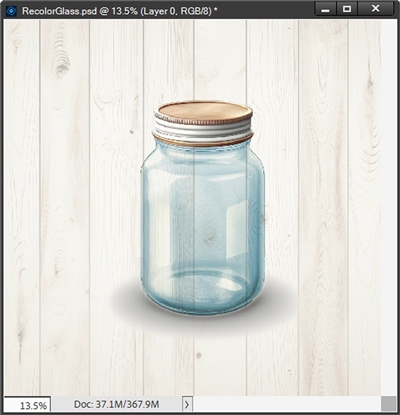
Problem solved. And in case you’re wondering how/why this worked here’s a reminder about how the Multiply Blend Mode works.
This mode multiplies the color values of the top blend layer (the jar) by the color values of the bottom/base layer (the background) resulting in a darker image. White disappears, black remains, colors darken and the resulting color is never brighter than the original.
Using the Multiply blend isn’t going to work on every non-translucent image. Generally speaking, only the white portions will completely disappear. If the image has a lot of dark colors, they’re just going to get darker which could disguise the translucency. But, it’s still worth trying!
Now let’s take a look at colored glass…
Recolor Glass – Colored
Here’s a unique bright pink mason bottle/jar:
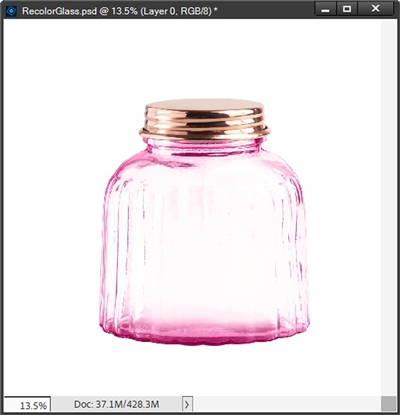
And yes, in this particular case I know this jar is truly transparent. If you’re ever unsure about the transparency of an element that “appears” to be glass, there’s an easy test.
If I hide the white background layer, I should be able to see the “empty” background (grey & white checkerboard) beneath the glass:
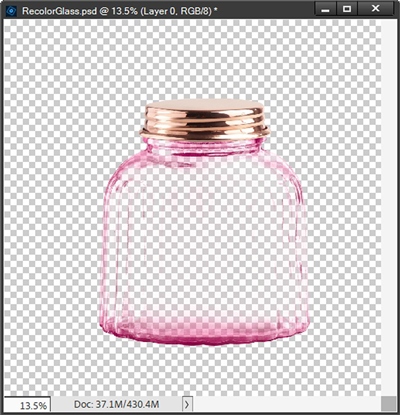
I’ll unhide the white background before moving on.
The steps for this method to recolor glass are going to be very similar to those I used on the other two jars. The single biggest difference is the change in the adjustment layer being used. And you’re likely wondering why I’m not using the same adjustment layer I used above.
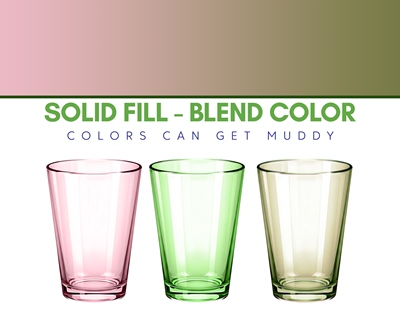
Here’s why. If I’m recoloring a translucent element using a Solid Fill Adjustment layer (Blend Mode of Color) the fill color used can take on some of the tones of the original element. This only happens when I use an Opacity of less than 100% for the fill layer.
Using a Hue/Saturation adjustment layer paired with a Blend Mode (Hue) negates that issue completely.
Just as with the other jars, I immediately duplicate the jar layer, rename the duplicate layer to Jar#3, hide the original and simplify the Jar#3 layer. This jar also has a lid and I make a selection around that and create a new layer from the selection (press Ctrl-J) and rename the new layer to Lid Only.
With the Jar#3 layer active ideally, I want to make a selection around the Jar#3 layer the way I did with the other jars (Ctrl-Click on the thumbnail). This way I can create the Hue/Saturation Adjustment layer and have the layer “automatically masked” as before.
Unfortunately, since this is a truly transparent element, things are going to work differently:
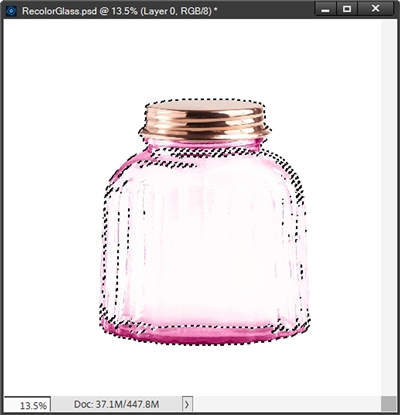
Yes, the lid is part of the selection but that’s not an issue. You should be able to see that the real problem is not all of the glass has been selected. That’s what happens when there truly are zero pixels in the totally transparent areas.
Clearly, if there are empty sections of that glass that have zero color (pixels) those sections won’t be recolored anyway. So, I could just sit here and assume that all of the pink portions of the glass are selected. But, over the years I’ve become a bit skeptical about how thorough PSE can be 😉 And I learned the hard way that sometimes it’s best not to leave things to chance!
Yes, I could go the extra mile to ensure all of the glass area is part of the selection. I’d merely modify the selection manually using the Selection Brush tool and switching between adding and subtracting parts. But it will take some time. And sometimes, I don’t always have enough of that.
It’s actually just easier to go ahead and create the Hue/Saturation Adjustment layer separately and clip it to the Jar#3 layer. I’m never opposed to taking the easy way out 😉

I want this new jar to be a bright green color. So, I set my Foreground color chip to a light minty green color (#a9fe8f). I then click on the Create New Fill or Adjustment Layer icon in the Layers Panel and select Hue/Saturation. PSE opens the Hue/Saturation dialog box and I click the Colorize box and change the Blend Mode on the Hue/Saturation layer to Hue:
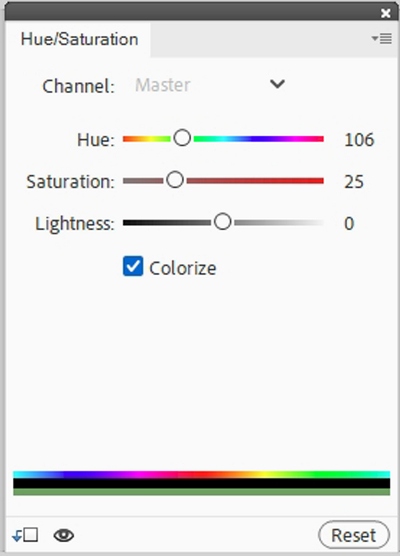
My first rule of thumb is to not change any of the settings at this point. If I’m going to do anything I may move the Saturation slider if the color is less or more vibrant than I had in mind. Normally there’s no need to do anything with the Hue slider because the base color was set by my Foreground color chip and I used the Hue Blend Mode. I almost never do anything with the Lightness, as adjusting it too much can destroy the transparent illusion.
I’m happy with things just the way they are so I close the dialog box by clicking the X in the top right corner. And here’s my green jar over that woodgrain background:
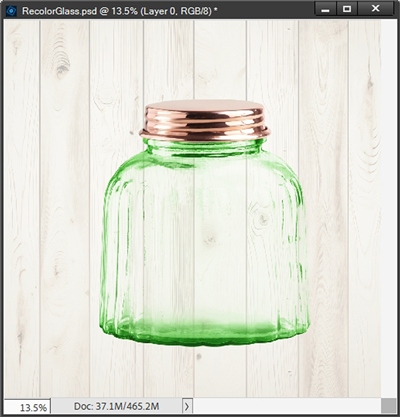
Could I have recolored that pink jar using the Solid Fill Adjustment and a Blend Mode of Color? Yes! However, the results can sometimes be very different depending on the colors being used.
In the case of the pink to green transformation above, there was a very slight difference between the two methods. I did still prefer the result when using the Hue/Saturation Adjustment. But I know from personal experience this is not always the case.
Here’s that purple jar that I created in the very first step. Remember, this jar too is also truly transparent:
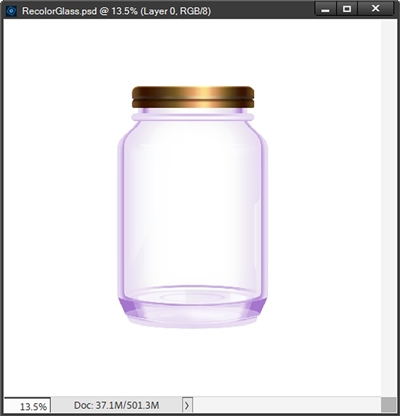
If I recolor it using a deep amber color (#883000) and the Hue/Saturation method, I get this:
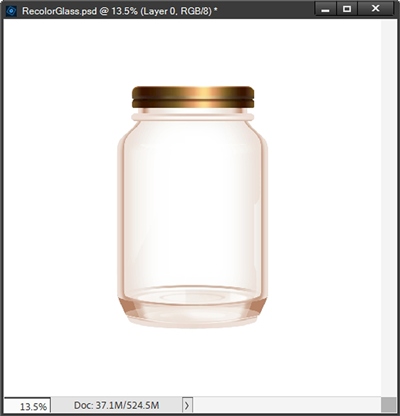
On the other hand, if I use the same color combination with the Solid Fill method, I end up with this:
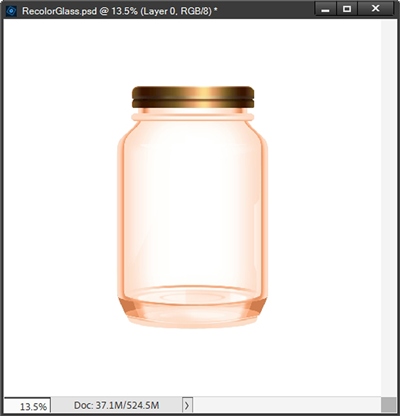
That’s a pretty dramatic difference. All I can say is you are welcome to try both methods to recolor glass and decide for yourself which presents the best result for you!
Here are a few other transparent elements that I’ve recolored:
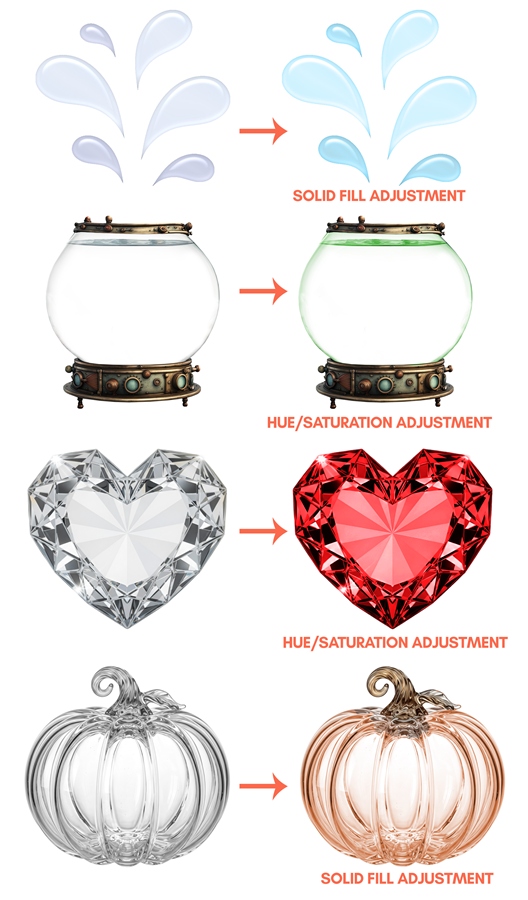
If you’ve read my Tricky Shadows post, the water splashes and fish bowl may look familiar 😉
I hope you can see that this technique actually works fairly well on a variety of elements. I hope you’ll give recoloring glass or other translucent images a try.
More Tips

Anytime you’re working with a realistic “glass” element and you’re having trouble getting the background paper to show through underneath, try changing the Blend Mode of the glass part of the element to Multiply.
You can always tell if an element is truly transparent with one easy test. Hide the white background layer. You should be able to see the “empty” background (grey & white checkerboard) beneath the glass.
If you try to recolor a glass or other transparent/translucent element that is comprised of mostly white (barely any other color), the Hue/Saturation Adjustment (Hue Blend Mode) method will not work. The image will remain mostly white. You can try using a different blend mode (Normal, Darker Color, or Color). The image will take on the new color but it won’t be as vibrant as when using the Solid Fill Adjustment method.
When using the Hue/Saturation Adjustment method, feel free to experiment with Blend Modes other than Hue. Depending on the element, sometimes a Blend Mode of Color or even Saturation will give a better result. Don’t be afraid to try other Blend Modes!
When using the Solid Fill Adjustment method, I typically discourage using any Blend Mode other than Color. However, depending on the element, sometimes a Blend Mode of Lighten, Lighter Color, Overlay, or even Soft Light can give interesting results. So, sometimes it doesn’t hurt to try other Blend Modes!
Regardless of the method used, don’t forget to play around with the Opacity to get varying results. And, you can change the Opacity on either the adjustment layer used or sometimes even the image layer itself.

A successful life is an authentic life. Happiness and creativity rest on a foundation of transparency to yourself and others. Knowing your own heart and speaking clearly to others keep you on the path. — Gay Hendricks
Thanks for reading this week’s Tuesday Tip. Remember, if you have any suggestions or questions please don’t hesitate to “Message Me”. Check back next week for tips about journaling border. Click “Follow Me” to stay in touch. I hope you have a wonderful week!