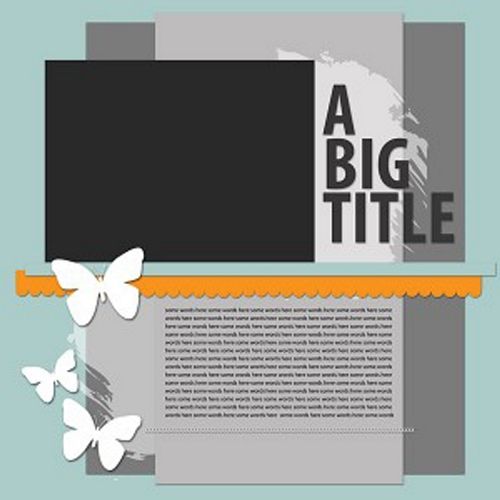
Templates
In my post about “Page Maps & Sketches” back in October of 2023 I kind of compared page maps to using digital templates. In that post I talked about how “back in the day”, a page map was an essential tool for most traditional scrapbookers.
Today as a digital scrapbooker I use templates a lot. Mostly for efficiency but often times as a road map or recipe for a layout. Especially if I’m lean on creative inspiration. So, in the digital world I would still equate page maps (loosely) to layered templates.
Note: The featured image above is a preview of a free template created by Simple Scrapper. Unfortunately, this free template is no longer available.
Somehow, I don’t think I’ve ever really written a post specifically about the advantages of using templates! I decided today was the day to extoll the virtues of digital templates.
Templates can be the baseline or the foundation of your scrapbook layout. Think of them as a blueprint for your layout. The template outlines the composition of the layout and gives you a guide to the placement of your papers, elements, photos, titles and journaling.
Most templates are available in one (or more) of several formats so they can be used in a number of different software programs. These are the common template formats:
- PSD: Fully layered files made for Photoshop (PS) and Photoshop Elements (PSE). Every component – backgrounds, photo spots, frames, text, and embellishments, etc., sits on its own distinct layer for easy modification. You can move (or remove) every shadow, frame, and shape independently. Compatible with PS, PSE, and free alternatives like Photopea or GIMP.
- TIFF: Large, high-quality files that keep all layers. They work in many photo programs and do not lose image quality when saved. These TIFF files work virtually the same as a PSD file. Opens in a wide range of photo-editing software like PS, PSE, CorelDRAW and Affinity Photo.
- PNG: Flat images with clear backgrounds. Each part of the layout (photo spots, frames, and brush strokes) comes as a separate PNG file. The individual PNG files must be loaded into an editing program layer by layer, usually following a number guide or stacking them from bottom to top. Unlike proprietary layered files (like PSD), plain PNG files can be opened in almost any graphics program, phone app, or specialized craft software.
Availability Of Templates
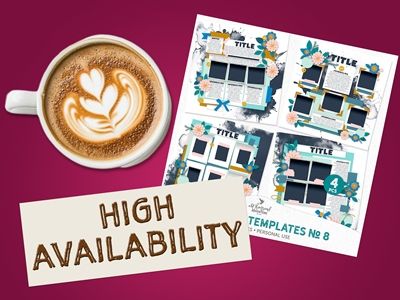
There are a multitude of designers out there who create templates that run the gamut from a design perspective. And there are a bazillion templates out there. They can range anywhere from being super basic, very artsy or all the way to extremely ornate and complex.
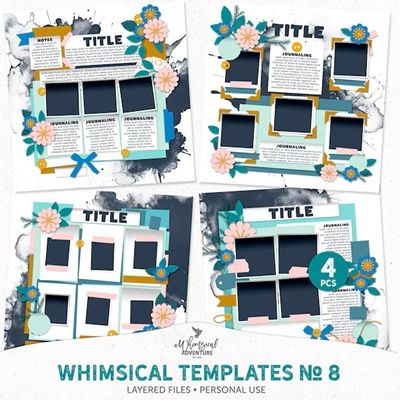
Note: The set of templates in the image directly above is “Whimsical Templates No 8” by A Whimsical Adventure. You can find her templates at either Oscraps or her Etsy shop.
If you go out to my “Shops & Designers” page (found in the blog’s primary menu) all you have to do is search for the word templates to find more than a couple designers who create them. And I challenge you to find a digital scrapbook supply store that doesn’t have templates on their menu.
There are even places where you can find free templates. You just have to know where to look. Kate Hatfield Designs is a good place to look for some free basic templates. And if you have already “Followed Me” you should have received a very basic template as a gift.
Not Cheating
Have you ever looked at a template and thought, “I don’t know, that seems like cheating?” I know I have. When I first started digital scrapbooking, I was hesitant to use templates. For one, I really didn’t know how they worked. But more importantly it made me feel like I was cheating because I wasn’t creating something original.
First and foremost, I want to tell you that using templates does not make you a cheater. And if you’re a beginner, there’s nothing better than a template to help you get your “digital legs” steady. I know they were a life saver for me when I first started using them 😉 Shhh…don’t tell anyone; some of my favorite layouts were made using a template.
Creating digital scrapbook layouts using layered templates (typically in PSD or TIFF format) is the fastest way to achieve professional-looking layouts without starting from scratch. Using a layered template just makes it easier to drop photos, papers, and embellishments into pre-designed blueprints.
Seriously, it’s not that different than using a recipe when baking. How many of us can make a pie or cake from scratch without a recipe?!? And when a recipe calls for vanilla and you prefer almond, you can make that change. If you’re supposed to use nutmeg but you don’t like it, you can leave it out. Or perhaps it says to use peaches and you prefer apples, go ahead and make the switch. Generally speaking, there is nothing in a template that is mandatory to use.
And just like a recipe we can tweak a digital template. Yes, templates are designed by someone else, but you get to take that template and make it your own whenever you use it to make a layout. Don’t feel like you’re doing a designer any injustice if you make changes to the design.
Templates Are Not Cookie Cutters
And speaking of recipes…I believe that most designers don’t expect that their templates are always going to be used merely like a cookie cutter; creating the exact same layout design over and over again. Any good designer worth their “salt” actually hopes it’s not being merely used to cover squares with paper, drop photos into frames or stick embellishments onto designated spots. I truly believe they want their templates to inspire more creativity in the user.
Another benefit to using templates is that they can teach you things. When I started using templates, I learned different ways to organize my Layers Panel in a more efficient way. I looked at sizes used for drop shadows and other layers. I also picked up new ideas for layout design, and so much more.
And the learning led to more individuality as I discovered more about the art of templates. If I don’t like the shadows or a font that a designer used on a given template, I can change those. If I’d rather have the design oriented 90 degrees to the left…I can do that. Nothing about the template is set in stone if I look at it with an open mind.

A funny comment just came to mind: “This is really just a gentle suggestion. The template police are officially off duty. Have fun!” I don’t remember where I first heard that and I find it eerily odd that it popped into my head right now. But it’s true. Think of the template as being there for moral support. If you don’t need some of it, feel free to color outside the lines, rearrange everything, rip it up, or do your own thing!
Layered templates are one of the best tools a digi-scrapper can keep in their digital arsenal. I can assure you, if I gave the same template to five different people and challenged them to show me just how versatile that template could be, I’d end up seeing five very different layouts.
Remember that set of templates in the image I showed you at the top of the section about availability? Here’s a better look at those templates:
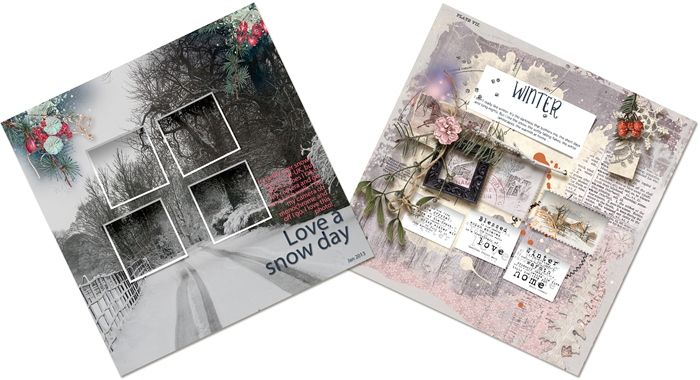
Here are two sample layouts (created by the designer’s creative team) to give you an idea of some “out of the box” thinking that can transform a template into a layout:
Explore Alterations
So, sometimes I find other ways to use a template. Every once in a while, I’ll see a template and go, “Hmmm, I could use part of that template for…”. In these cases, not only am I not following “the recipe” to the letter; I’m actually creating something new. I’m going to give you a quick example.
Quick reminder; I use PSE 2024. If you use a different version, some of my screen shots may not look the same as what you see on your screen.
I have a template from “Starburst Templates Vol 1” by Adrienne Skelton Designs:
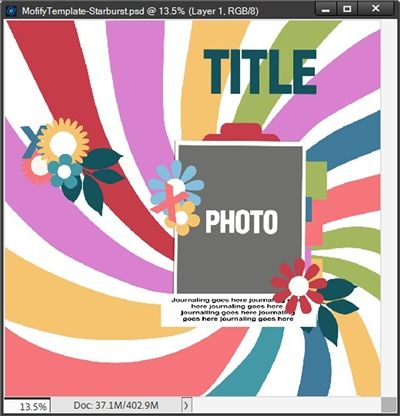
I love that spiral starburst pattern and I’d love to make a journal card. I know, you’re thinking this might not turn out so well. I’ve learned a few tricks along the way and one of the first things I try when I want to re-size a template is to just crop it to 8.5×11. But I only do that when I’m confident about the outcome.
There used to be a lot of content aware PS “Resize-It Actions” available that would easily resize a layered 12×12” layered PSD templates “automatically” to a variety of sizes: 8.5×11, 8×10, 5×7, etc. Today they are a lot harder to find. But there is a really nice one available from StudioKitsch on Etsy (will not work in versions of PSE older than 2023).
Note: I mentioned content aware above. What that means is the action uses the Content-Aware Scale tool (not available in PSE) to change dimensions while intelligently protecting important subjects from distortion. Instead of stretching every pixel evenly like a normal resize, it identifies key details and only stretches the empty or less important background areas.
I have an older PS action (no longer available) that could do that for me but I want to show you how it can be done “manually”. It may not work on every template or image every time. But it works more often than you might think!
I just grab the Crop tool and set the “geometry” to Custom, the width (W) to 8.5 inches and the height (H) to 11 inches. And here are the suggested outcomes PSE displays:

It really doesn’t matter which one I pick. I’ll have the opportunity to reposition the crop “box” if necessary. I know I want a fair amount of the “spirals” on the right side to still be visible. So I’m going to select the third suggestion from the left:
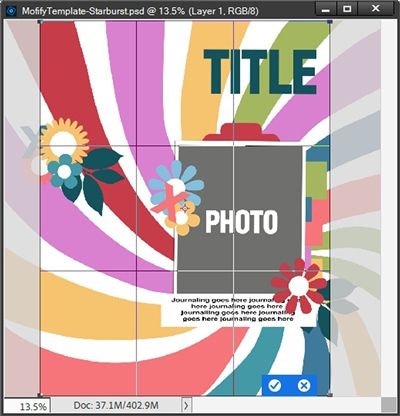
That’s pretty good but I am going to nudge the crop box a bit more to the right until I see a bit more of the rightmost “gold” spiral:
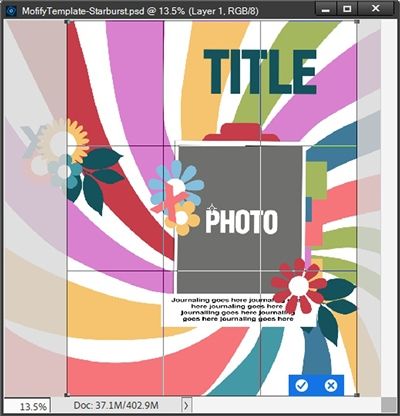
I’m happy with that and I click the checkmark to confirm.
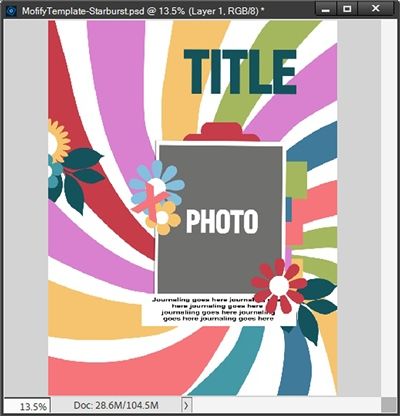
I then immediately save this altered template as a PSD file with a unique name (ModifiedStartburstTemplate). This way I know I will still have the original template. From here on I’ll be working with the modified template.
Note: I realize that a large part of the cluster on the left side of that template has been cut off. I’m not overly concerned about that at this point because I won’t be using that cluster. Besides that, the original layers are still there. Even though the placeholders may no longer be visible, their position is still in the Layers Panel as a point of reference. I can always go back to the original template if I need to reinsert that cluster.
The next thing I do is go in and hide any of the layers I don’t plan to use for this journal card. Thankfully the designer (Adrienne Skelton) has all the spiral layers stacked together at the very base of the Layers Panel. So, all I have to do is select the layer above that first spiral:
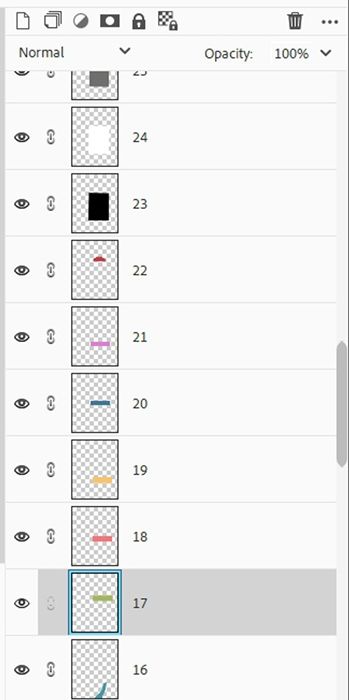
Then while holding the shift key I scroll upwards in the Layers Panel until I get to the top and I click that top layer:
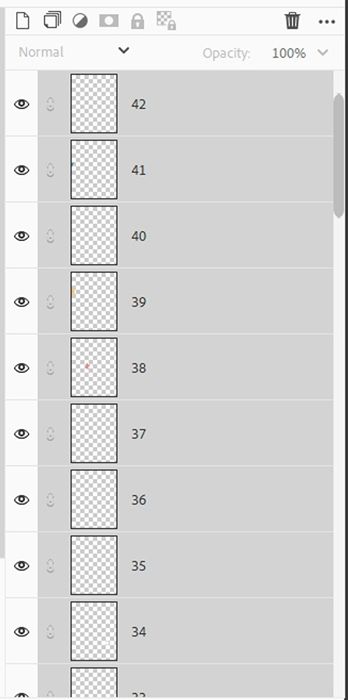
I can now right-click on the visibility toggle (the eye icon) at the left edge of that top layer and select Hide this layer:
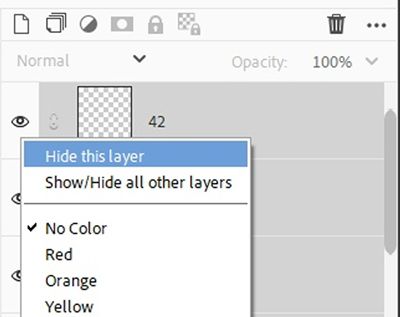
And PSE hides the selected layers and I’m left with only the spirals visible:
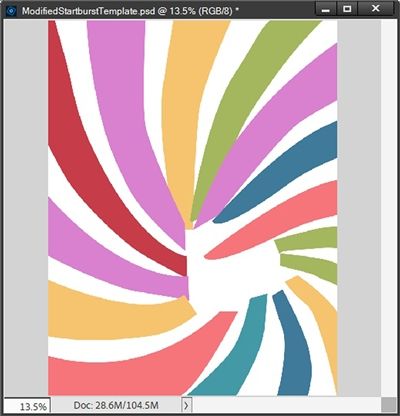
I bet you’re as surprised as I was to see that all of the spirals didn’t meet in the middle. But it’s okay, I was going to add something there anyway 😉
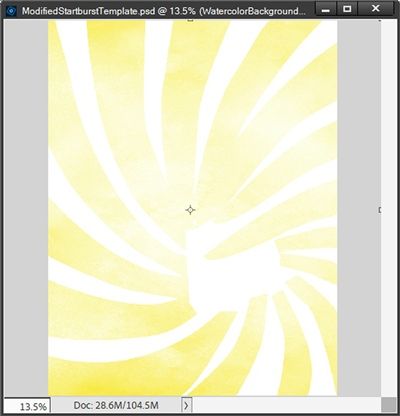
The vision I have for my journal card actually has all of those spirals looking like yellow watercolor. I have a lovely paper in my stash that should work out just fine. Now, rather than clipping the same paper to each spiral layer individually, I’m going to create a group and clip the paper to the group layer:
Now for the “white spot”. I also have a pretty sunflower transfer in my stash that I’m going to place over that area:
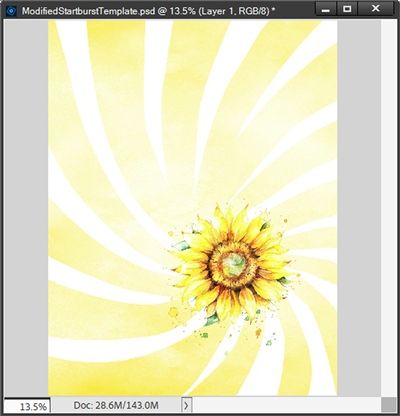
If I must say so myself, that turned out even better than I’d planned. So, how’s that for taking a template and using it “outside the box”?
Now I can save this as either a JPG or PNG file for use as a journal card later. Yes, it’s a bit large at 8.5×11 but, truth be told…I almost always make my journal cards bigger than most. They’re easy enough to make smaller later.
Now I’m going to go back to the original template and hide everything except the spiral layers again. But I’m going to leave it full size and rotate the entire file horizontally:
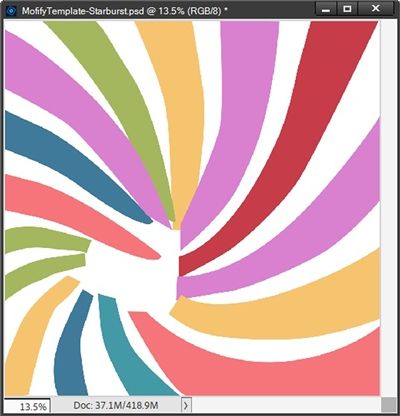
This time I’m going to create a piece of paper that will coordinate with that journal card. And just as I did with the journal card, I’m going to use that same watercolor paper and sunflower transfer:
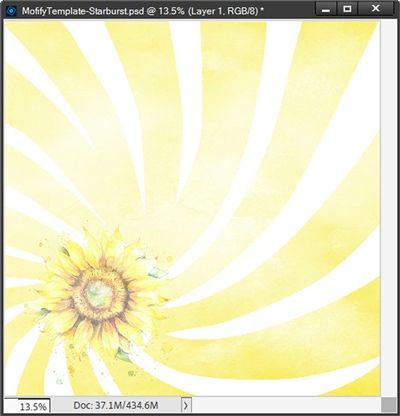
Now that I’ve shared how versatile a template can be, hopefully you’ll never look at templates the same way ever again. If so, then job well done on my end 😉
Tips For Templates
Using templates can help you create unique and beautiful layouts if you can master the tricks for using them. And remember that it’s not cheating!
If you see a cluster on a template that you’d like to use elsewhere…borrow it! Just copy the layers to whatever file you have in progress. Or better yet, copy them to a new blank file and save it as a cluster template!
Before you start making changes to a template, save a copy of it using a unique name and work on that “new” template. This way you won’t lose the original template.
While templates offer great structure, they are meant to be a starting point. You can swap out the default shapes, change the colors of text and embellishment layers. If the template is too busy, simply eliminate the elements that don’t fit your vision.
If you think a template looks “flat”, you can easily add transparent texture elements like digital vellum or paint splatters to the background.
Most designers tend to create their templates using the most basic of fonts. They do this for a couple reasons. Not everyone has the same fonts and they don’t want you to get a warning box telling you that a font is missing. And they also want to keep things “non-descript” so as not to curb your creative juices.
While the world does its best to mold you into a cookie cutter version of everyone else, remember to simply be you: brave, adventurous, authentic and perfectly imperfect. — Unknown
Thanks for reading this week’s Tuesday Tip. Remember, if you have any suggestions or questions please don’t hesitate to “Message Me”. Check back next week for tips about curvy borders. Click “Follow Me” to stay in touch. I hope you have a wonderful week!
