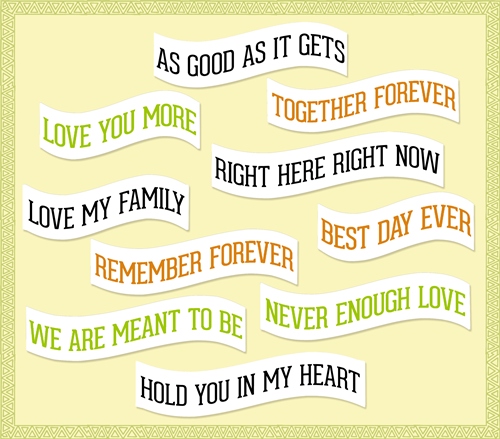
Wavy Word Strip
In my “Stripes” post back in June, I showed you how to use the Wave filter to create a wavy stripe pattern for paper. Today I’m going to show you how using that same filter can turn a straight word strip into a wavy word strip.
Adding a wavy word strip breaks up rigid lines and adds a playful sense of movement to a layout. A wavy shape of any kind adds a gentle, flowing contrast. Wavy word strips feel more casual and fun. They work extremely well for party invites and/or associated layouts.
Wave Filter
In Photoshop Elements (PSE) the Wave Filter distorts an image by creating a randomized or patterned wave distortion. This filter can be used to create a pattern on a layer or a selection. The values chosen in the dialog box will determine how the wave pattern looks. Before I create my wavy word strip, I want to briefly explain how this filter works.
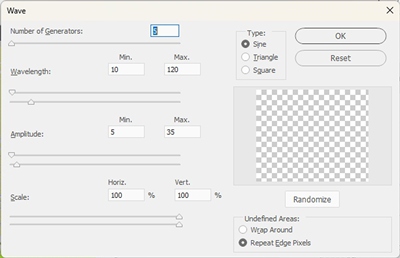
The wave filter dialog box includes several key controls that change how the distortion looks:
- Number of Generators determines how many different waves are created. One generator means the waves will all be identical. Five generators mean there will be five different kinds of waves.
- Wavelength determines the distance between waves. The smaller the range between the Minimum and Maximum, the closer together the waves will be.
- Amplitude determines the height of each wave from the top of the wave to the middle of the image being distorted. The lower the value, the smaller the wave height and the less distorted the layer becomes.
- Horizontal and Vertical Scale sets the height and width of the waves, either horizontally or vertically.
- Type: Sine creates a rolling, smooth and bendy wave. Triangle creates sharp, angular peaks. Square creates blocky, step-like waves.
- Undefined Areas has two options. These determine how empty edges created by the distortion are handled, such as wrapping around or repeating edge pixels.
Note: In my “More Grunge” post back in October of 2025 I explained in a bit more detail what each of the Wave filter settings will control. If you’d like to see more details about those settings, please refer back to that post.
Word Strip Base
Just a quick reminder; I use PSE 2024. If you use a different version, some of my screen shots may look different from what you see on your screen.
I’m going to create a simple word strip to get things started. If you already have a word strip from your supplies that you’d like to use, feel free to skip this part and scroll down to the Wavy Word Strip Settings section.
As is my habit, I open a new blank 12×12 file and set my Foreground/Background color chips to the defaults (press D). With the base layer active (Layer 1 for me), I click the Create a new layer icon at the top of the Layers Panel. I do this because I want to be sure that my word strip will be on its own layer. Then, I grab the Rectangular Tool.
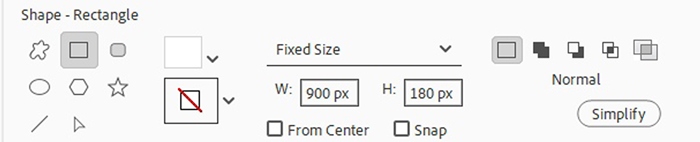
I have a rough idea about the size I want this word strip to be. So, in the Tool options I set the geometry (unlabeled) to Fixed Size. I then set the width (W) to 900px, the height (H) to180px (roughly 3” by .6”) and ensure that the Create new shape layer icon is selected:
Next, I swap my Foreground/Background color chips (press X) so that white is on top. All I have to do is click somewhere near the center of the file and PSE creates a white rectangle (Shape 1 layer for me):
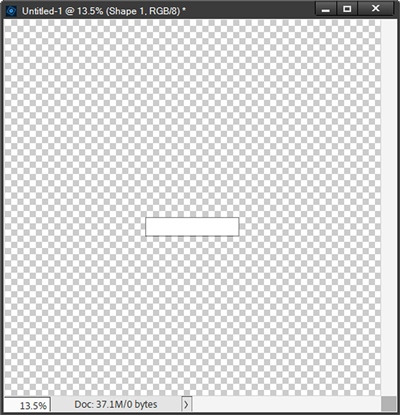
I am going to simplify the Shape 1 layer now for two reasons. First, this needs to happen before I can use the Wave filter. While a shape layer is not a “smart object”, it is a vector graphic. And if you’ve been following me for a while, you already know what that means. In order to perform any destructive action (such as a filter), these types of layers must be rasterized (simplified).
But another reason is that if I try to add a type layer by clicking directly inside a “smart object” (such as the shape layer), PSE will automatically convert my cursor into a text boundary icon (an I-beam inside a circle) and a bounding box appears that conforms to that shape. This means the text will be restricted to the inside or the path of the shape rather than acting as a free, independent single line of text.
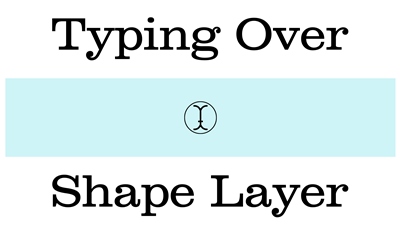
I don’t want a text box; I just want a simple line of text. That will make things easier for centering the text on the rectangle. Hence the main reason I simplified the shape layer at this particular point!
Note: If you’re not familiar with “smart objects” and would like more details about them, please refer back to my “It’s All About The Size” post from July, 2023.
I’m going to zoom in fairly close for the rest of this.
I swap my Foreground/Background color chips (press X) so that black is back on top. With the white rectangle layer active I grab the Horizontal Type Tool. I set the font to Clarendon Book, the Size to 25, the Leading to Auto the Tracking to -5, I click the Center Text icon and I ensure that the color is already set to black.
Note: You can use whatever font, color and sentiment that suits your project. Just be sure your text fits within the confines of the rectangle.
I then click once near the center of the word strip and type my word:
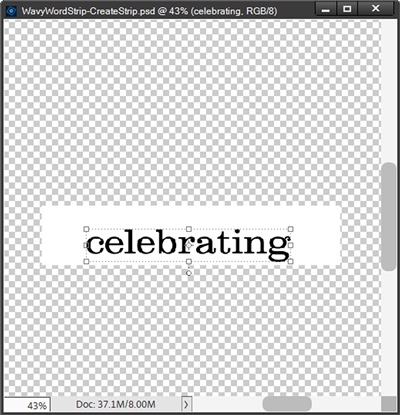
Clearly, I want that word centered on the word strip. With both the rectangle and text layers active I select the Move tool (press V) so I can see the Align and Distribute options at the bottom of the work area.
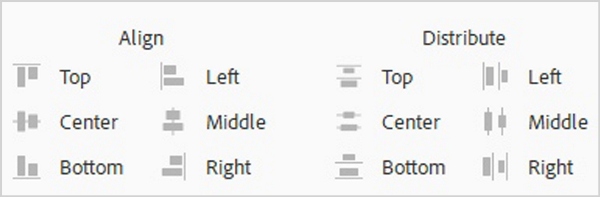
First, I will click the Center icon under the Align category. I will then click the Middle icon under that same category. My word is now perfectly centered on the rectangle:
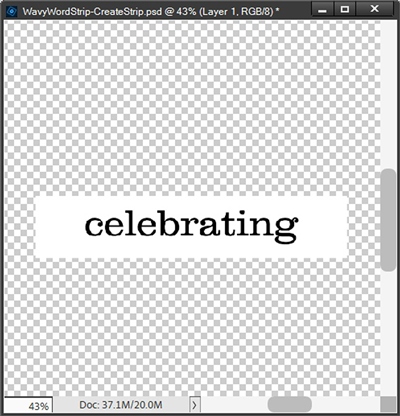
I can now crop the file to size:
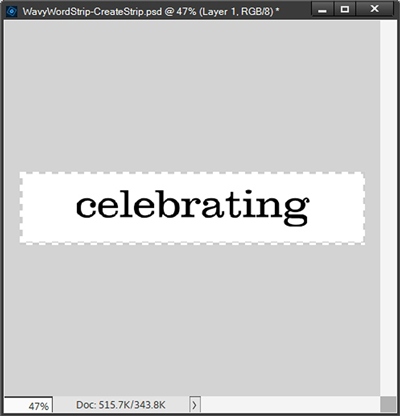
Then, I save this as a PNG file with a unique name (WordStrip-Celebrating01_YSC) for use on my project. As soon as I save this as a PNG file the text and rectangle become merged.
Note: if you’re creating a word strip on an existing project, please be sure to merge the text with the word strip before proceeding to the next section.
I know you’re not going to be surprised when I tell you that I am also going to save this as a PSD file (WordStrip-Celebrating). I do this more as a precaution in case I run into any problems with or need to make changes to this word strip when I add it to my project.
I can now close this file and open my project.
Wavy Word Strip Settings
Here’s a birthday card I’m working on and I’ve pulled my word strip in and positioned it where I want it:
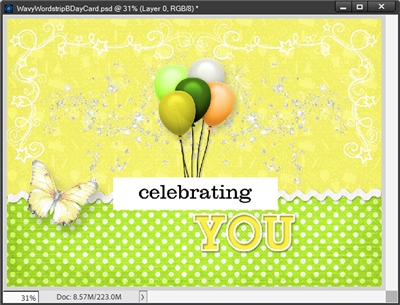
With the completed word strip active in the Layers Panel, I go to the top Menu Bar and select Filter->Distort->Wave. PSE opens the Wave filter dialog box:
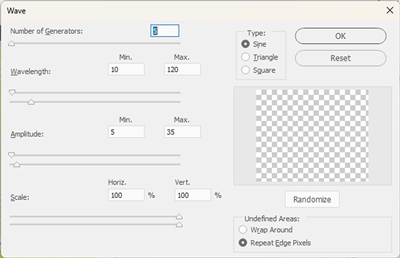
I set the Number of Generators to 1, the Wavelength Minimum to 300, the Wavelength Maximum to 522, the Amplitude Minimum to 10, the Amplitude Maximum to 100, the Horizontal Scale to 100%, the Vertical Scale to 100%, the Type to Sine, and Undefined Areas to Repeat Edge Pixels:
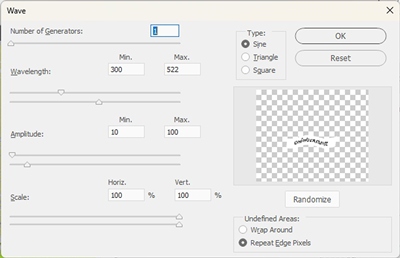
Note: If you are using a pre-existing word strip that is of a different size than the one I created, you may have to adjust the values for the Wave Filter depending on the length of your word strip in an effort to achieve the same wave effect.
You should be able to see the preview for my wavy word strip in the image above. I’m pretty happy with how that worked out. So, I click OK to confirm. And here’s how that word strip looks now:
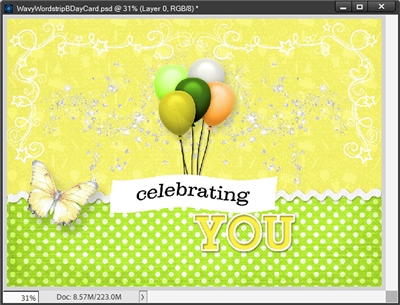
It was only after some trial and error that I ended up choosing the values above based on how wavy I wanted my word strip to be.
Note: Please be aware, even when using a word strip of the exact same size as the one I used, you may not get the same results. The Wave filter can produce different results on identical objects because it uses an internal random number generator tied to your workspace coordinates or the order in which the filter processes data. Once again, thanks PSE for another random quirk 😟
This word strip is a little bigger than I needed but that’s not a big deal, it can easily be resized. And I do want to change the color of the text. That too is easy enough to do here. But I also think I’d like the strip itself to not be such a stark white.
Good thing I have that PSD file, huh 😉 Here’s how it looks with those changes:
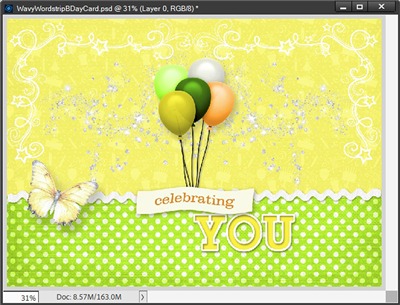
Note: If you’d like to see more details about this card, you can find it in my 2026 Gallery. The name of the card is “Celebrating You”.
Extra Tips
There is one Wave filter setting I didn’t use today that can actually be a fun experiment; the Randomize button. It will generate a new, unpredictable variation of the wave distortion while keeping your currently chosen values intact. You can click it as many times as you like. If you end up not liking any of the variations just click Cancel. Then just open the Wave tool again and your settings should still be there!
Set the number of generators to a single digit (like 1 to 5) if you want clean, predictable waves. Higher numbers (up to 999) create chaotic, abstract, or glitch-style distortions.
Set the minimum and maximum sliders to the exact same number if you want a uniform, repeating pattern instead of random stretching.
Sadly, there is no way to resize the Wave filter dialog box or its small preview window in PSE. That’s such a shame because it would really be nice to get a closer look at the preview. A good workaround is to just use trial and error. Apply adjustments to settings, click OK, and just undo (Ctrl-Z) the filter if the wave pattern is too big or small.
Experiment with the Wave Type: Use Sine for smooth, rolling organic waves. Choose Triangle or Square when you want sharp, geometric, or digitized zigzags. For word strips, Sine usually works the best. But trying others can be fun!
And remember, there’s no guarantee you’ll get the same wave pattern results even when using a word strip of the exact dimensions and the identical filter settings that you used the last time!
Creativity is like the ocean: sometimes it is an unstoppable wave bursting forth, crashing onto the shore, and overwhelmingly flowing with no hope of restraint; other times it is completely still, lingering aimlessly and endlessly, seemingly devoid of any inspiration.
— Ken Poirot
Thanks for reading this week’s Tuesday Tip. Remember, if you have any suggestions or questions please don’t hesitate to “Message Me”. Check back next week for tips about vellum elements. Click “Follow Me” to stay in touch. I hope you have a wonderful week!
