Curvy Border
In last week’s post I talked about templates and how using them isn’t cheating. I’m sure you’ve seen layouts that have lovely curved border edges and wonder what template was used. Well, guess what? You actually don’t need a template. Today I’m going to show you how to quickly create a charming curvy border using a simple selection and a filter.
That’s right, a filter. If you read my post about stripes back in June, you might be thinking I’m going to use the Wave Filter. Nope! Today I’m actually going to talk about another filter that I’ve not yet covered. Read on…
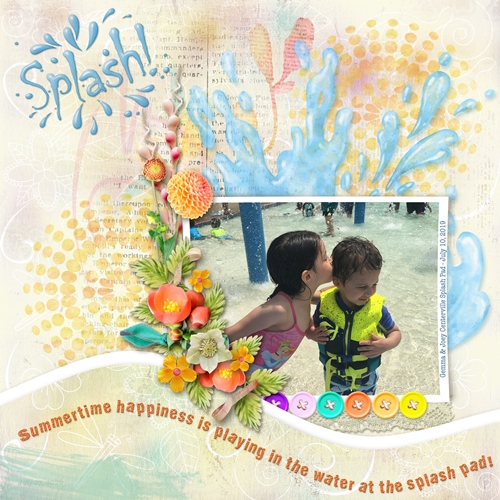
Note: The featured image at the top of this post is a layout I created to show a curvy border. If you want more details about this layout, you can find it in my 2026 Gallery. The title of that layout is “Splash Pad Fun”.
Curvy Border Via Shear Filter
That’s right, I’m going to show you how the Shear Filter works for creating curvy borders.
Quick reminder; I use Photoshop Elements (PSE) 2024. If you use a different version, some of my screen shots may look different from what you see on your screen.
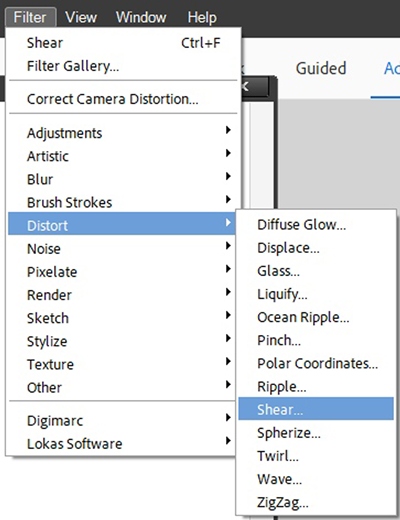
In PSE the shear filter is actually nested with other filters under the Distort category:
The Shear filter in PSE distorts an image (or selection) along a customizable curve. It works by letting you manipulate a vertical line in a dialog box to pull and bend pixels horizontally.
Create Curvy Border
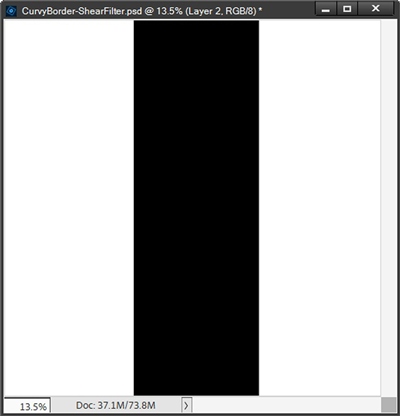
As is my habit, I’m going to start by creating a new 12×12 file with a white background. Next, I grab the Rectangular Marquee Tool. In the Tool options, I click the New Selection icon. I then set the Feather to zero, the Aspect to Fixed Size, the width (W) to 4 inches and the height (H) to 12 inches.
Then I click near the top center of the file:
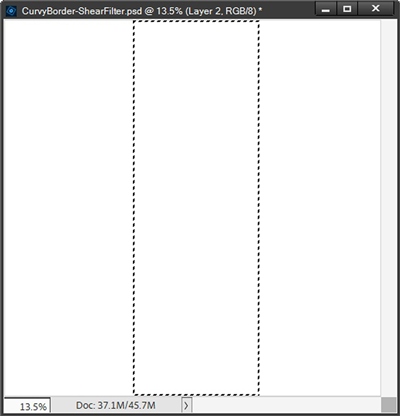
I want this rectangle on its own layer so I click the Create a new layer icon in the Layers Panel. With that new blank layer active I press Alt+Backspace to fill the selection with black and cancel the selection (Ctrl-D or Esc):
Curve The Rectangle
With the rectangle layer active, I go up to the top Menu Bar and select Filter->Distort->Shear. PSE opens the Shear filter dialog box:
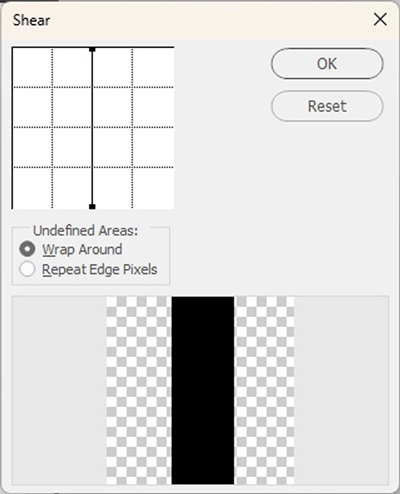
The dialog box shows a vertical grid with a line down the middle. I can click directly on the line to add anchor points, then click and drag those points left or right to warp the image. Adding multiple points, I can create complex, wavy, or zig-zag distortions.
I don’t need to get too complex today. So, I’m just going to click at the intersection of the vertical line and the first horizontal dotted line. I then drag that anchor point approximately a third of the way into the box to the left:
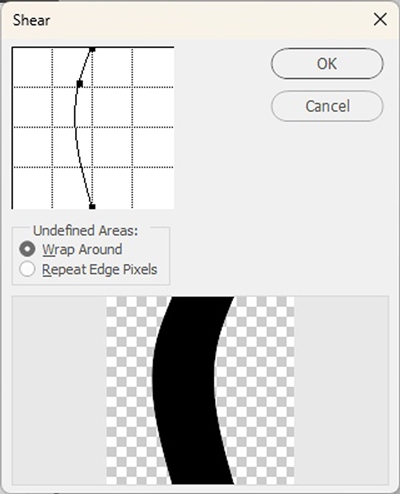
Then I click at the intersection of the vertical line and the third horizontal dotted line and drag approximately half of the way into the box to the right:
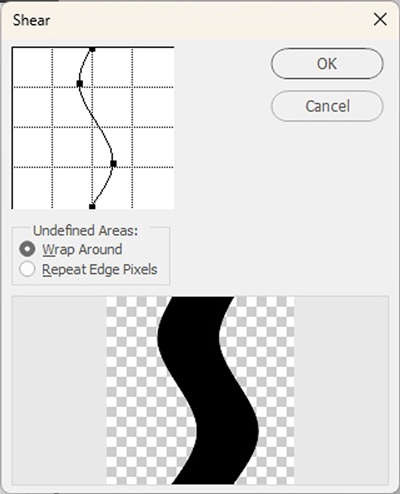
When you pull pixels out of alignment like this, empty spaces or stretched edges can appear. The filter provides two options to handle these spots called Undefined Areas.
Wrap Around: Fills the newly created empty space on one side using the image content from the opposite side. Repeat Edge Pixels: Extends and stretches the very last row of edge pixels outward to fill the void.
I’m going to set the Undefined Areas to Wrap Around.
If I wasn’t happy with how the curve was starting to look, I could just reset the grid. All I have to do is hold down the Ctrl key. PSE will toggle the Cancel button in the dialog box to now read Default:
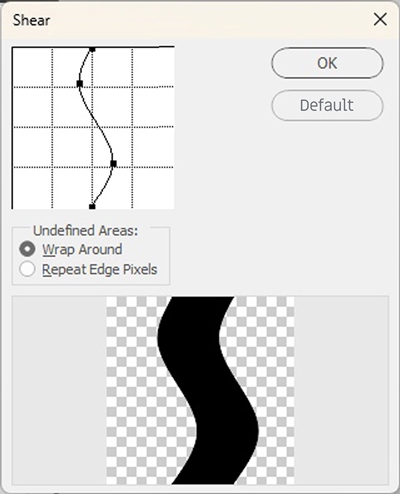
While still holding the Ctrl key I can click the Default button and the grid returns to the original default with just the straight line down the middle.
Note: If you want to try again with only a particular part of the shape all you have to do is drag one or more of the anchor points that you added completely off the grid and PSE will remove the curve(s).
I’m actually happy with the current shape so I click OK to confirm:
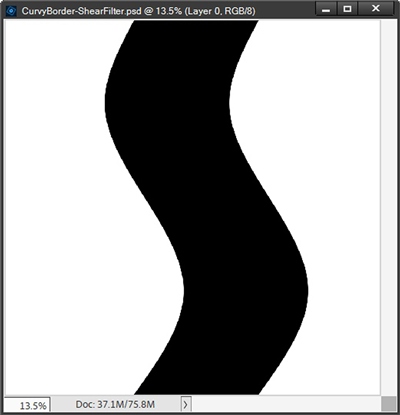
Clearly that’s not a border. But all I have to do is nudge that shape over to the edge of the file until I have as much of the border showing as I want:
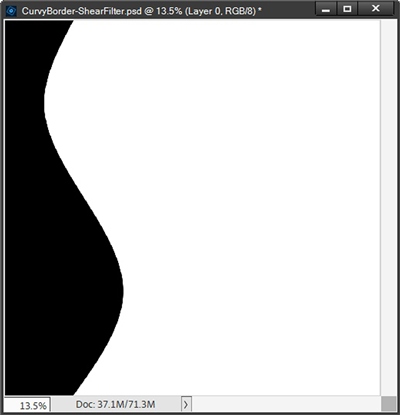
Note: Instead of just nudging the shape you can also hold down the Shift key as you click and drag the shape directly horizontally to the desired position on the left edge of the file. Holding down the Shift key while clicking and dragging ensures that the item maintains its horizontal (or vertical) position.
Now, I could stop here with just this one border shape, but that seems kind of plain. So, I’m going to create a layered border. For a simple layered border all I have to do is duplicate (Ctrl-J) the current curvy border.
With the duplicate layer active, I Ctrl-Click on the thumbnail of the layer to create a selection around the new curvy border:
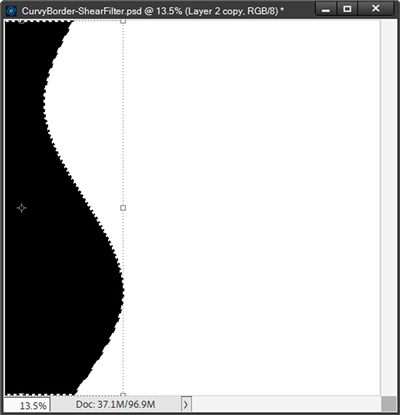
You should be able to see the marching ants around the shape. I then set my Foreground color chip to a medium grey color (#808080) and press Alt+Backspace to fill the selection with that grey color and cancel the selection (Ctrl-D or Esc):
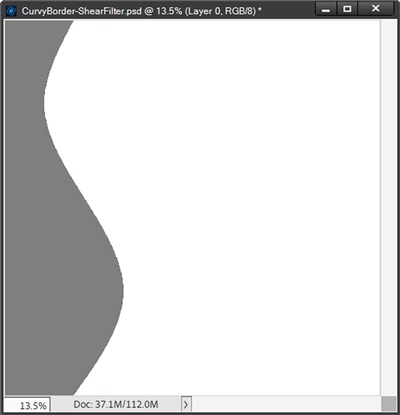
Now I can just nudge that grey layer over to the left as much or as little as I like:
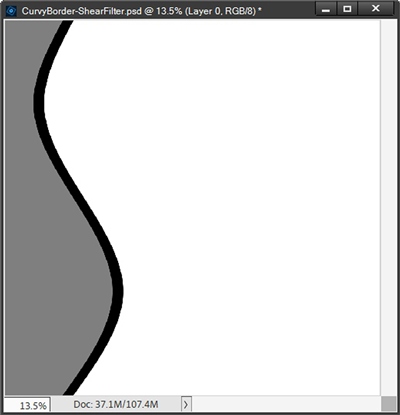
Now, I could go on and create additional layers for this border simply by repeating the same process I used on the grey layer. But another, more interesting option would be to create a duplicate of the grey layer, recolor it another color (maybe red), then flip the layer horizontally, flip it again vertically and nudge it to the left just a bit:
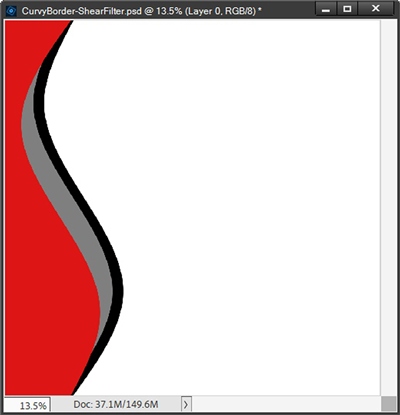
How’s that for a different curvy border? I definitely want to save this as a PSD file so I can use it as a template later. But if you read my “It’s All About The Size” post back in July of 2023, you should know that some clean-up is required before I do that. Let me show you…
Curvy Border Clean-Up
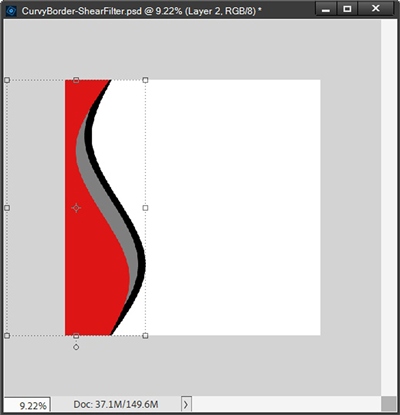
Right now, the active layer is the black one. Do you see how the bounding box extends beyond the edge of the file by more than just a little bit? That’s not a good thing when I’m trying to keep the size of a PSD file down to its absolute minimum. And that bounding box issue gets progressively worse with each of the other two layers.
On my system the current size for the PSD is 3.18MB. For now, I’ll simply “crop” the file to 12×12 (eliminating all the material left of the edge):
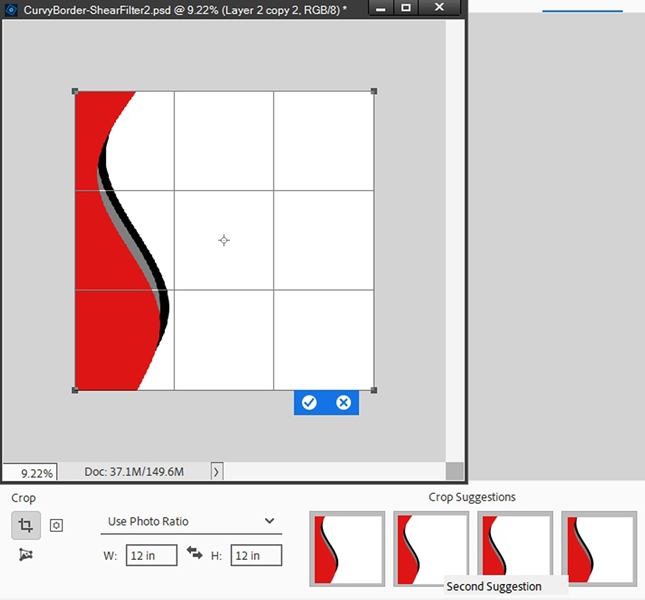
After I commit this crop, I look at the file size only to find that it actually increased in size to 6.48MB. Yet another undocumented feature in PSE. I talked about this in the aforementioned “Size” post back in 2023, I could never find a good explanation for why this happens. However, today I finally know.
Here’s what happens. By cutting off the extraneous material along the edges, PSE might reduce the actual image down to, for example, 10×10 inches of real pixels (3000 x 3000 pixels). Because the Crop tool settings are rigidly locked to 12×12 inches at 300 DPI, PSE actually stretches and invents pixels to blow that smaller 10×10 image back up to a 12×12 size.
The raw image data remains 6.48MB, but because PSE had to use complex mathematical interpolation to blur, stretch, and generate new pixel variations to upscale the cropped area, the saved PSD file size inflates. Upscaled, blended pixel layers take up significantly more complex storage data than the original crisp pixels did.
Clearly, eliminating extraneous material along the edges of any PSD file simply by “cropping” the file to 12×12 is the worst possible solution to managing file size.
Sorry for that detour but I thought it was important because so many tutorials tell us to “crop a file to size” when we have material outside the file’s dimensions.
For years I’ve been using a completely different method. I actually “cut” the layer to size. I’ve talked about this in multiple posts over the years, most specifically in regards to papers that are clipped to layers in a layout. The principle is the same for anything that extends beyond the edges of the file.
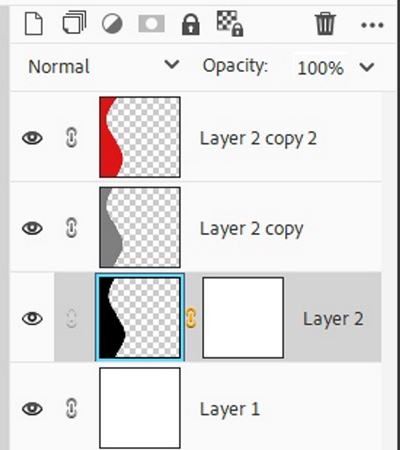
With the black curve layer active, I Ctrl-Click the thumbnail of the white base layer. PSE creates a selection around the white background. Ensuring the black curve layer is still active, I click the Add layer mask icon in the Layers Panel. PSE creates the layer mask but it looks like it hasn’t masked anything away and the bounding box for the black layer still extends beyond the edge of the file:
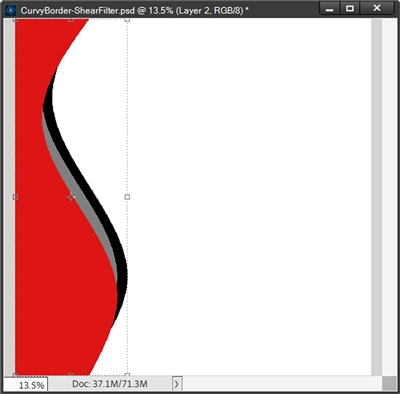
The next step in this “cutting” exercise is to simplify the layer. This causes PSE to automatically apply (or merge) the mask permanently into the layer, deleting the mask thumbnail and making the hidden pixels gone for good. And now the bounding box for that black layer no longer goes beyond the edge of the file:
I do this for the other two curvy borders and when I save this as a PSD file, the size is now down to 2.49MB vs. the original 3.18MB. That may not look like a significant drop but every byte saved matters!
And to end things on a happier note, here’s a different layout using curvy borders that I created:

This layout might look familiar if you read my post about photo tags earlier this year! And if you’d like more information about the layout, you can find it in my 2026 Gallery. The title for this layout is “Family”.
Quick Tips

Experiment with different kinds of curved shapes. Don’t be afraid to put more than 2 bends on a single curvy border.
Play with rotating borders not just vertically and horizontally to get different effects. Also try rotating them by 90 degrees so you end up with a curvy border along the top or bottom of a layout.
Even though my examples look like the borders are mostly the same shape, don’t shy away from combining different types of curves on the same layout. Just let your imagination soar!
Another fun thing to try is even after you’ve created a nice curvy border, you can still go on to modify it further using other Transform tool options such as Warp, Skew or Perspective.

This world is but a canvas to our imagination. – Henry David Thoreau
Thanks for reading this week’s Tuesday Tip. Remember, if you have any suggestions or questions please don’t hesitate to “Message Me”. Check back next week for tips about curvy alternatives. Click “Follow Me” to stay in touch. I hope you have a wonderful week!