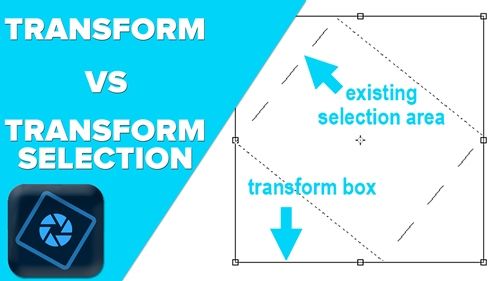
Transform Options
In my post about “Using Word Bits” earlier this year (June 2), I briefly showed you how to transform a selection. I recently ran into someone who kept getting the transform tool and Transform Selection mixed up. So, I thought I’d take a minute to give you a better explanation about the two different transform options.
You definitely don’t want to make the mistake of mixing up Transform and Transform Selection. A lot of people think they’re the same but they have totally different purposes.
Transform (Free Form)
Quick reminder; I use Photoshop Elements (PSE) 2024. If you use a different version, some of my screen shots may not look the same as what you see on your screen.
This is a destructive version of the transform options. PSE alters the actual pixels inside the selection. PSE permanently recalculates and resamples the pixels. If you stretch, shrink, or warp an image layer and commit the changes, you permanently degrade or lose some of that image’s original data.
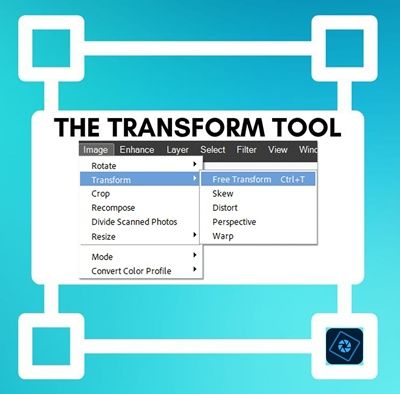
This tool lets you scale, rotate, skew, and adjust perspective all in one continuous operation. You access this tool by going to the top tool bar and choosing Image->Transform->Free Transform (Ctrl-T). A bounding box with handles will appear around the object. Drag any handle to reshape it.
You can use specific keyboard shortcuts while dragging to switch modes on the fly:
- Scale: Drag a corner handle. Hold Shift while dragging to maintain proportions.
- Rotate: Hover your mouse slightly outside of a corner handle until the cursor turns into a curved double-arrow, then click and drag.
- Skew: Hold Ctrl + Shift and drag a side handle.
- Distort: Hold Ctrl and drag a corner handle.
- Perspective: Hold Ctrl + Alt + Shift and drag a corner handle.
Transform Selection
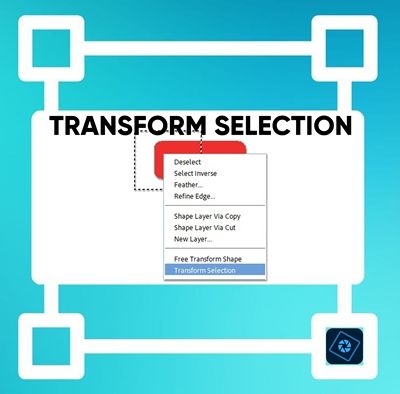
This is a non-destructive version of the transform options. PSE alters only the size, shape, or perspective of the selection outline (the “marching ants”) rather than the actual image pixels underneath. You can scale, skew, or distort the border without affecting the pixels themselves, giving you precise control before you perform an action like cutting, copying, or filling.
You can access the tool only after a selection is made. It has no shortcut. Right click inside the selection and choose Transform Selection. Then just drag the handles on the bounding box to resize. Hold the Shift key to maintain the original aspect ratio. You can move the selection by clicking and dragging inside the box, or even rotate it by grabbing a corner handle of the bounding box and dragging until you have the desired angle.
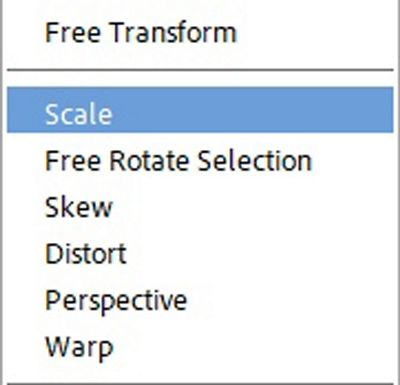
For more complex transformations, you can right-click inside the active transform box to choose options like Skew, Distort, Perspective, or Warp:
Transform Options Examples
I’m going to be using an old greeting card template from my stash:
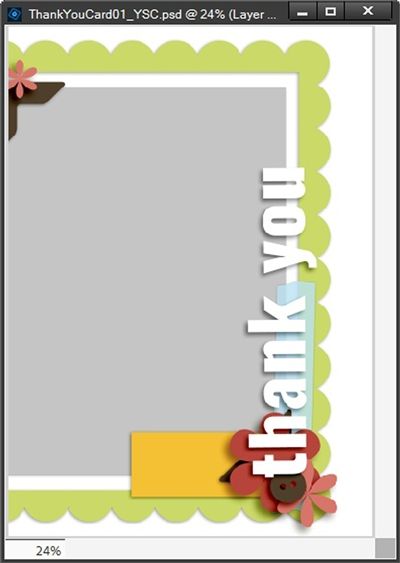
Take note of that orange rectangle near the bottom-right corner of that card. You might be thinking I’m going to be using the rectangular Marquee tool for the transform options. Let’s see how that’s going to work.
With that rectangle layer active I’m going to go ahead and grab that tool. I click the New selection icon then set the Feather to zero and the Aspect to Normal. I then click and drag out a selection on the file:
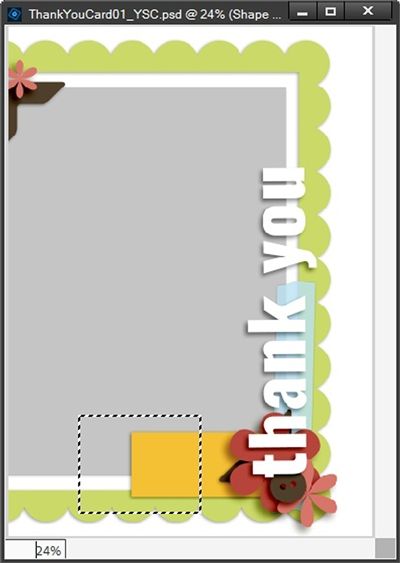
In order to cut a notch out at the end of that rectangle I need to rotate my selection. Now, if I simply try to use Transform (Ctrl-T) to rotate from a corner handle of the bounding box, this is what happens:
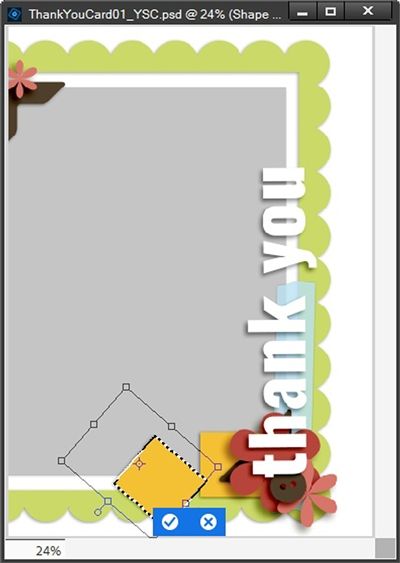
PSE is going to cut those pixels off the end of that rectangle which is not at all what I want.
So, I’m going to go ahead and undo that (click the X) and I’ll be back to the selection outline. In order to transform just that selection and not the pixels inside, I’m going to Right-Click inside the selection outline and choose Transform Selection:
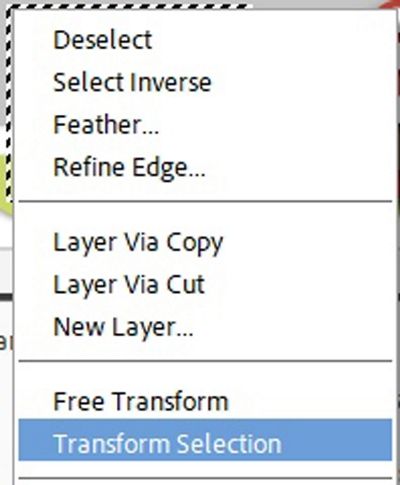
After I select that I once again have a bounding box around my selection just like before:
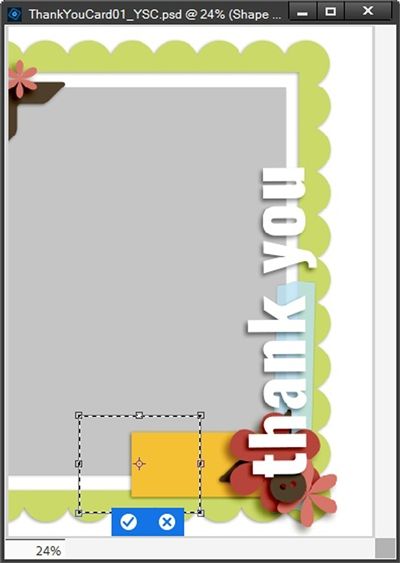
But this time when I hover my cursor over the corner handle of that bounding box and then click and drag in a circular motion it’s only going to change the selection not the pixels inside the selection:
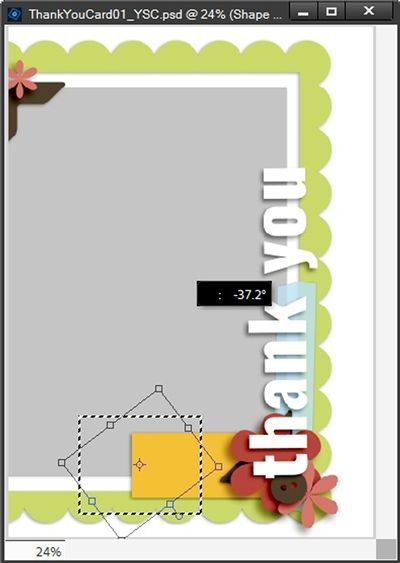
So, I’m going to place the bounding box such that I will be able to cut out my notch at the end of the rectangle so it looks more like a flag or banner.
Now, with this bounding box the same principles of transforming apply; I can use any one of the anchor points to skew, distort or otherwise warp the selection. Something like this:
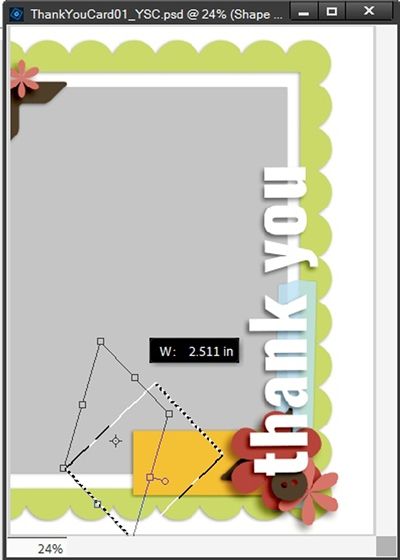
You can see how that’s going to skew the selection. I don’t really need to do that so I’ll click the X to cancel. I still have my selection but I need to Right-Click inside the selection outline and choose Transform Selection again.
Now, I’m just going to click inside the selection and drag it into the desired location:
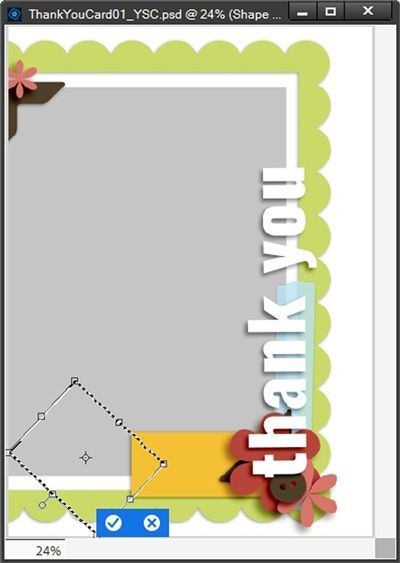
Notice that PSE only transformed the shape/location of the selection not the pixels within the selection. I’ll click the checkmark to confirm. I can now press the Backspace key to remove the desired pixels and cancel the selection (Esc or Ctrl-D):
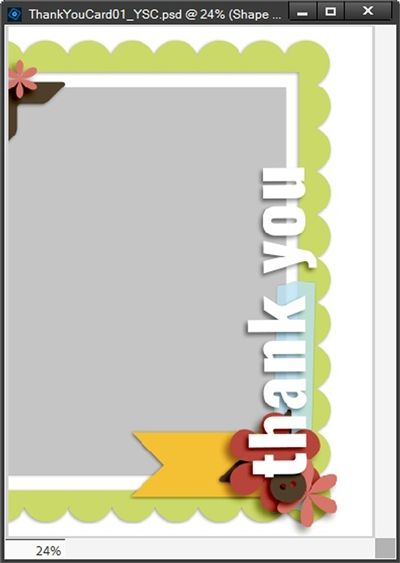
And that’s exactly what I was going for! And here’s how that greeting card turned out in the end:

If you’d like to see more details about that card you can find it in my 2026 Gallery.
Now that you know the difference between Transform and Transform Selection, I hope you’ll play around with the options a little more.
Transform Options Tips

Mastering the Transform tools allows you to easily resize, rotate, and reshape layers, selections, or shapes.
For both Free Transform and Transform Selection you can use any selection method you choose.
If your initial selection isn’t perfect, use the Refine Edge Brush before transforming to ensure you grab exactly what you need.
In order to use the Transform Selection option, the layer must be simplified first.
Don’t be confused by the fact that the Transform Selection option did result in pixels being removed from the original layer. Just remember, transforming the selection in and of itself was not destructive. It was only after the selection had been transformed and confirmed that any destructive action took place.
Once your selection is transformed (confirmed) you can delete, recolor, reposition it or even copy the selection to a new layer.

Creativity gives hope that there can be a worthwhile idea. – Edward de Bono
Thanks for reading this week’s Tuesday Tip. Remember, if you have any suggestions or questions please don’t hesitate to “Message Me”. Check back next week for discussion about templates. Click “Follow Me” to stay in touch. I hope you have a wonderful week!
