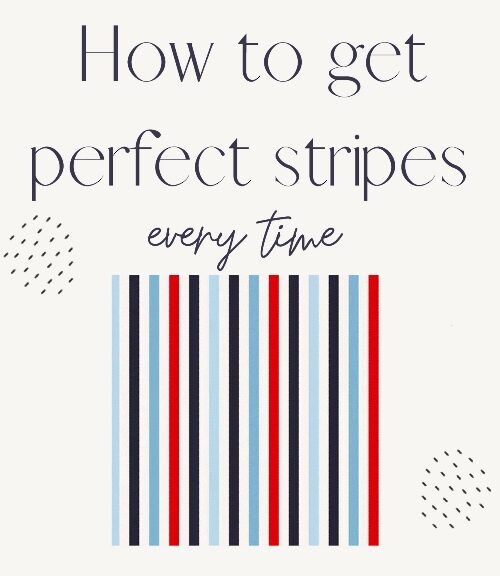
Stripes
In last week’s post about a “Scallop Border” I showed you how to make some using the ellipse tool and other standard Photoshop Elements (PSE) Shapes. Well, guess what? It’s equally as easy to create perfect stripes using some of the same steps I used last week.
This super quick technique doesn’t end there. I’ll also show you how to alter the stripes to make wavy or zigzag patterns!
Many Lines
Quick reminder; I use PSE 2024. If you use a different version, some of my screen shots may look different from what you see on your screen.
Just as last week, I’m going to start by creating a new 12×12 file with a white background. Next, I grab the Rectangle Tool:
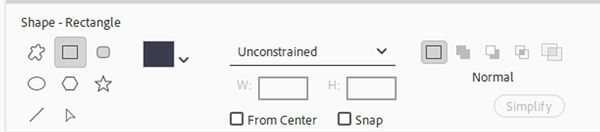
My Foreground Color chip is set to black, and that’s what color shows up in the Rectangle Tool. You can use whatever color you like.
Last week I discussed the geometry section (unlabeled) within the “shape” tool options. With one exception (Circle vs. Square), the geometry options are the same when using the Ellipse and Rectangle (square or rounded) tools. Given that, I’m not going to go over those options again today.
There is one setting for rectangles that we didn’t see last week with the Ellipse tool, Snap. Checking this box tells PSE to “snap” the edges of the rectangle to the pixel boundaries. This means that the rectangle will be solidly filled with the chosen color.
I know that sounds weird. I too used to assume (a dangerous thing to do) that a shape would always be solidly filled. If you look extremely close at the edge of any shape that is not comprised of all perfectly straight lines, like a circle, the edge looks something like this:
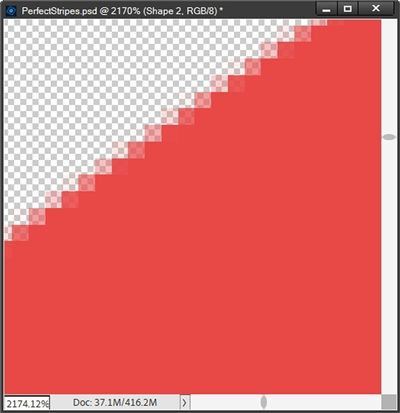
You should be able to see all those “edge” pixels of varying shades of the red color (#ec4444) I used. When seeing the circle at normal size, we don’t see these varying pixels. Rather we see a smooth edge.
If you look extremely close at the edge of a rectangle shape you may or may not see a line of pixels around the edge that is generally about 30% lighter than the original color. If the rectangle was created using the Snap option, it will be solidly filled clear to the edge:
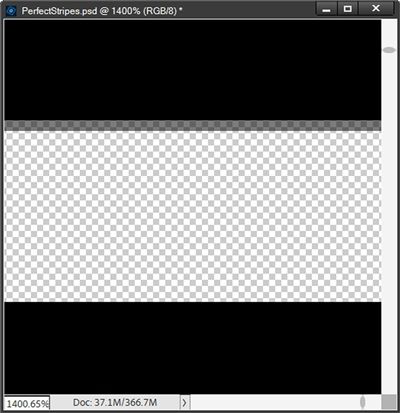
You should be able to see the difference between those two black lines. So, the question in your mind is likely, “Does it really make a difference?” For what I’m going to be doing today, it really doesn’t matter whether I click the Snap box or not. But I still wanted you to know what it did.
Now I’ll create my first stripe…
I’m going to use Fixed Size and set the width (W) to 3600 pixels and the height (H) to 90 pixels. I leave From Center and Snap unchecked. Then I position my cursor so that the top of the crosshairs is even with the top of the file and the center of the crosshairs is even with the left edge of the file. I then click once. PSE creates a perfect stripe (Shape 1 for me):
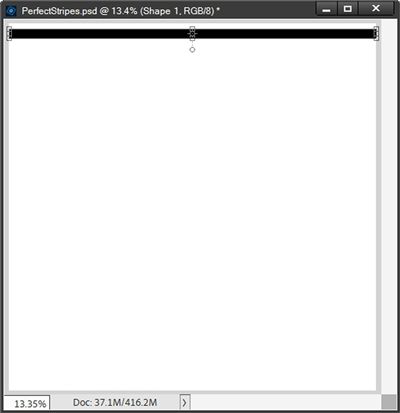
Note: It is always important to double-check that the rectangle is flush with the edges on each side of the file.
Shape 1 is the active layer. I press Ctrl-J nineteen (19) times. I now have a total of twenty (20) stripes stacked one on top of the other. Shape 1 copy 19 is the active and top layer in the Layers Panel.
And just like last week, I hold down the Shift key and press the Down-Arrow key to nudge that stripe down to the bottom of the file. I want to try keeping the distance between that stripe and the bottom edge approximately the same as how the stripe at the top looks:
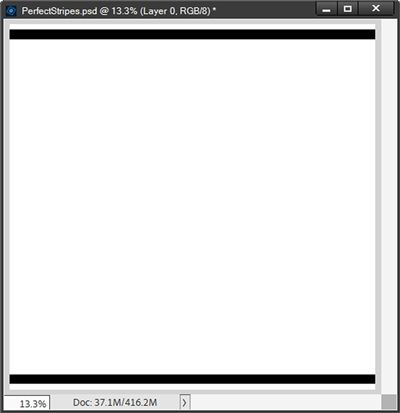
Note: The best way to ensure consistent spacing is to turn the Grid feature on (Ctrl+Apostrophe (‘)). For my stripes there is a one grid square between the top of the file and the top stripe. Conversely, there is a one grid square between the bottom of the file and the bottom stripe. This generally leads to Distribute – Bottom working out perfectly almost every time. I can’t guarantee that but it’s always at least very close to perfect for me! You can use whatever spacing you like. Just be sure it’s consistent.
Shape 1 copy 19 is still the active and top layer in the Layers Panel. Just as with the scallop border, I select all of the stripe layers (Shape 1 thru Shape 1 copy 19) in the Layers Panel.
All The Stripes
With all the stripe layers active, I grab the Move tool and find the Distribute options. This time I click on the icon in the Distribute section that is next to the word Bottom:
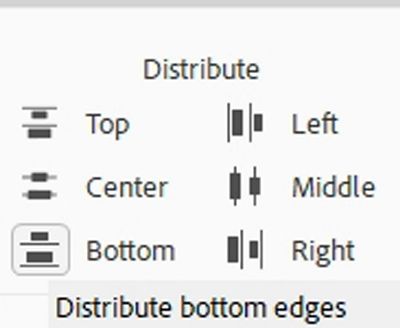
PSE then distributes the stripes evenly down the file:
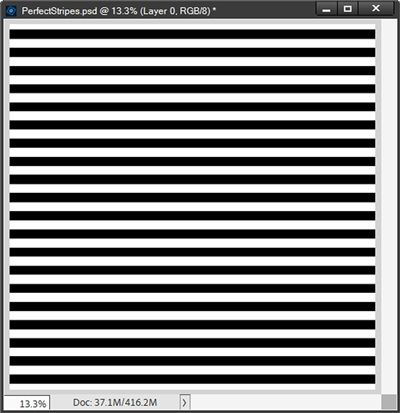
All the stripes are perfectly aligned. How easy was that?
I can merge the stripe layers together leaving me with a single layer (still Shape 1 copy 19 for me). But I’m not going to do that just yet. Instead, I’m going to hide the white background and save this striped pattern as a PNG file. This will be a handy little “template” anytime I need stripes.
Altering Stripes
Let’s take a look at what happens if I delete all the layers except for the original Shape 1 layer, duplicate that layer nine (9) times and nudge the top layer (Shape 1 copy 9 for me) to the bottom. Then I select all ten (10) stripe layers (Shape 1 thru Shape 1 copy 9) in the Layers Panel and Distribute – Bottom:
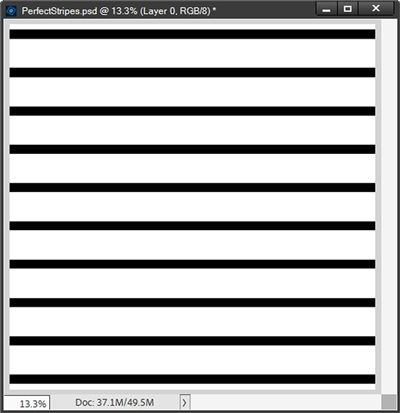
Again, perfectly aligned stripes just with more space between. I did this on purpose because I don’t have to use just one size of stripes. Before I move on, I am going to do two things. I hide the background and save this new stripe pattern as a PNG file then restore the background. I then create a group with these wide spaced stripes. I name the group to Wider Stripes.
Varying Stripes
With the Wider Stripes group active in the Layers Panel, I grab the Rectangle Tool. My settings should all still be the same. I am going to change the height (H) to 60 pixels for this set.
Then I position my cursor so that the top of the crosshairs is even with the bottom of the top stripe and the center of the crosshairs is even with the left edge of the file. I then click once. PSE creates a perfect stripe (Shape 2 for me):
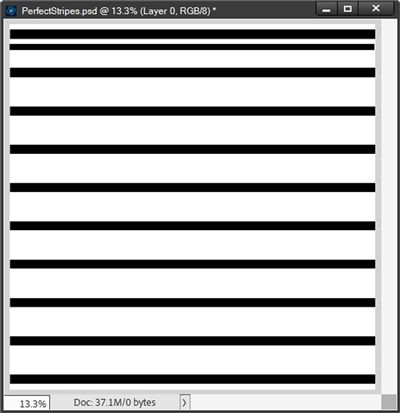
I duplicate that layer eight (8) times and nudge the top layer (Shape 2 copy 8 for me) to below the bottom of the next to last stripe. I want to try keeping the distance between those two stripes approximately the same as how the top two stripes at the top look:
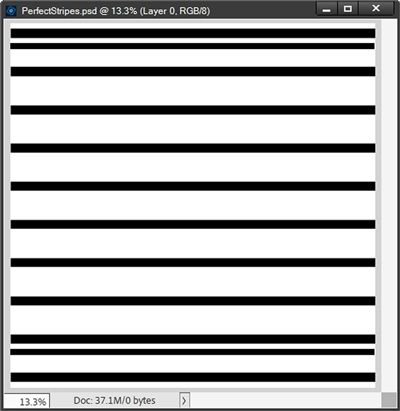
Note: Again, use the Grid feature to ensure that the spacing on the set of stripes at the bottom is identical to the spacing on the set at the top (my stripes are one grid square apart).
Then I select all nine (9) thinner stripe layers (Shape 2 thru Shape 2 copy 8) in the Layers Panel and Distribute – Bottom:
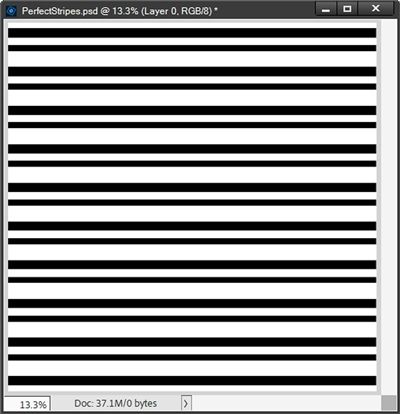
This looks nice but unbalanced. But that’s okay. I’m going to add an additional thin stripe between each of the original thicker stripes. So, I’m just going to repeat the process I used for the thinner stripes above…
But first, I hide the background and the Wider Stripes group so I can save this new thinner stripe pattern as a PNG file. Next, I select all the new thinner stripe layers and create a group named Thinner Stripes #1. I then restore the background and the Wider Stripes group.
With the Thinner Stripes #1 group active in the Layers Panel, I grab the Rectangle Tool. My settings should all still be the same. I am going to change the height (H) to 30 pixels for this set.
Then I position my cursor so that the top of the crosshairs is just barely below the bottom of the thinner stripe and the center of the crosshairs is even with the left edge of the file. I then click once. PSE creates a new thinner stripe (Shape 3 for me):
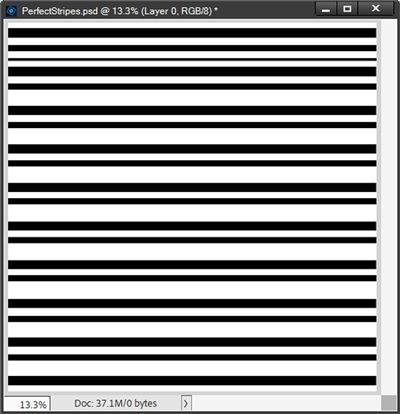
Then I can duplicate and distribute this second thinner stripe just as I did with the first one above:
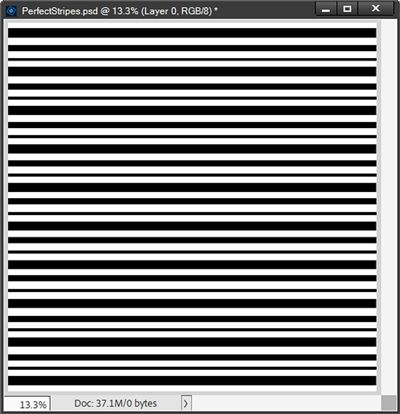
I’m going to save this second set of thinner stripes as a PNG file just as I have with the others. I will also save this as a PSD file. This will give me a nice template with varying stripes that I can color individually.
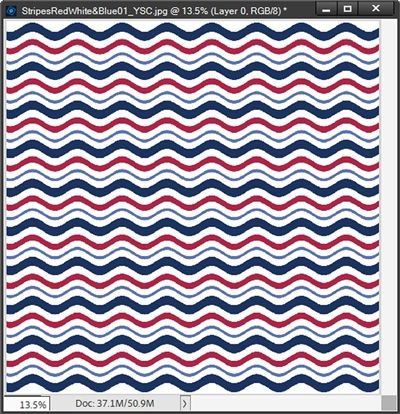
With that template I can add solid fill layers to each of the different sized groups of stripes to create a multi-color stripe pattern like this:
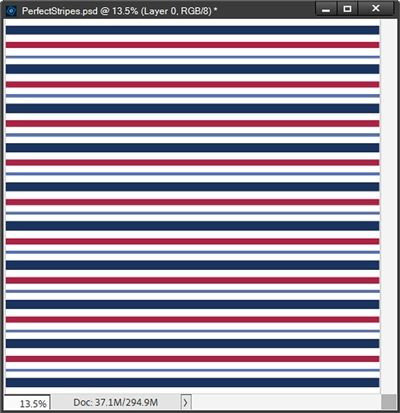
Note: In case you’re interested, I used #0a3161 for the dark blue, #b31942 for the red and #5079ba for the lighter blue.
Now that you know how easy it is to create perfect stripe patterns I hope you’ll have fun making some of your own using rectangles of one or multiple sizes!
Since I saved all the individual stripe sizes in the PSD file, you may be wondering why I saved each separate set of stripes as a PNG file. Not only can they be used to create simple stripe patterns, they can also be used to create completely different patterns altogether…
Creating Other Patterns
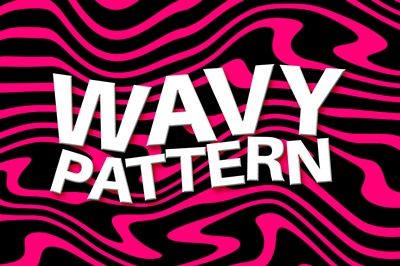
One of my favorite things to do with a stripe pattern is to turn it into a wavy pattern. There are multiple ways to do this. The pattern in the image above was created using the Distort->Liquify Filter. That method is fun but it takes a while to get the hang of things.
An easier method is to use the Distort->Wave Filter. It too isn’t always a walk in the park but I find I have more control with the various settings.
In my “More Grunge” post back in October of 2025, I showed you how to use the Wave filter to create a grunge effect. In that post I explained what each of the settings will control. I’m not going to get into all those details today. If you want to learn more about those settings, please refer back to that other post.
I will however, share a very nice collection of settings that should get you headed in the right direction.
I’m going to pull in the PNG file I saved from the very first set of stripes I created and place it over the white background:
I used the PNG because all the stripes need to be on a single layer. Yes, I could have merged the original stripes (in the PSD file) for that first pattern, but I want the flexibility to change the colors on some or all of those stripes in the future.
With the stripes layer active I go to the top tool bar and select Filter->Distort->Wave:
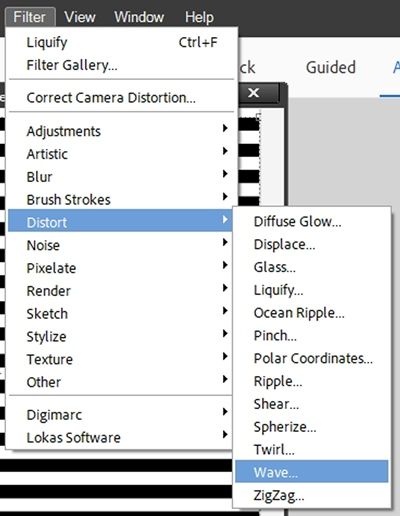
I enter the following settings:
- Type = Sine
- Number of Generations = 5
- Wavelength: Min. = 209 Max. = 210
- Amplitude: Min. = 32 Max. = 37
- Scale: Horiz. = 100% Vert. = 100%
- Undefined Areas = Wrap Around
I click OK to confirm and I have this lovely wavy pattern:
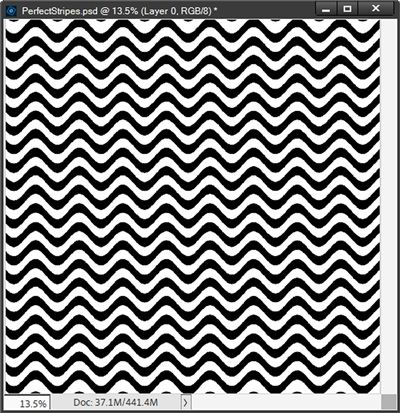
I can choose to save this as a JPG (paper) and/or as a PNG (template). You can do whatever makes the most sense for you.
For now, I’m going to undo (Ctrl-Z) that wavy filter and get back to the plain stripes. Then I open the Distort->Wave filter again and use all the same settings with the exception of changing the Number of Generations to 12. With that setting I get this:
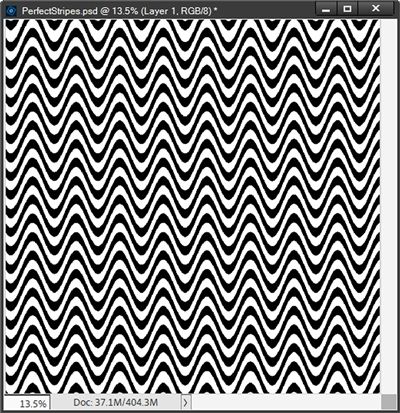
You can see that simply changing that one setting can generate a fun new wave pattern. And here’s how that pattern with varying size stripes looks using those most recent settings but changing the Amplitude Min. to 20 and Max. to 22:
And here’s a fun straight background stripe pattern where I started out with a thin pink stripe over a black stripe:
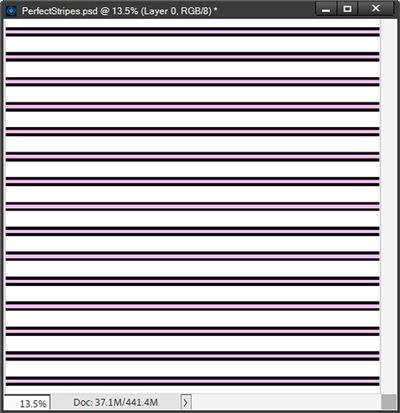
With that new stripe pattern, I used the following settings:
- Type = Sine
- Number of Generations = 5
- Wavelength: Min. = 209 Max. = 210
- Amplitude: Min. = 95 Max. = 101
- Scale: Horiz. = 100% Vert. = 100%
- Undefined Areas = Wrap Around
And look at this extra wavy pattern:
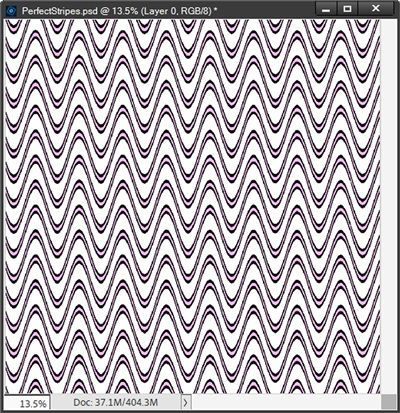
And using that same straight pink over black stripe pattern I can use the Distort->Wave filter to create a zigzag pattern:
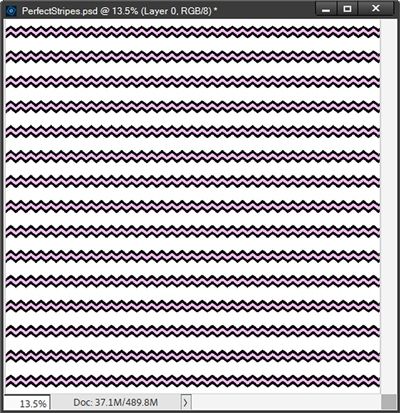
This time the settings were as follows:
- Type = Triangle
- Number of Generations = 9
- Wavelength: Min. = 97 Max. = 98
- Amplitude: Min. = 63 Max. = 64
- Scale: Horiz. = 8% Vert. = 8%
- Undefined Areas = Wrap Around
I could go on with examples but I’m guessing you’ve got the idea.
I hope you’ll have fun making some zigzag or wavy lines of your own using simple stripes!
Today’s Tips

The best tip I can give you is to ALWAYS be sure that the top and bottom stripes are exactly the same distance away from the top/bottom edge. If they aren’t the distribution will be off.
And if you’re adding alternating stripes of different sizes, it’s equally important to ensure the top and bottom stripes are exactly the same distance away from the preceding stripe.
Using the Grid feature will make it easier to keep the spacing consistent between stripes/edges.
The more rectangles you create initially will change how close together they are when distributing them. Using a larger size will also affect the distribution.
Don’t limit yourself to whatever color you used to create the stripes. Clip a paper (solid, patterned, glitter, etc.,) or add a Solid Fill Adjustment Layer to the pattern to create whatever look you want.
Don’t be afraid to play around with the settings when creating wavy or zigzag patterns from your stripes.
Here’s a really different idea. Try creating a wave or zigzag pattern then go back and reapply the same filter (without changes) and watch what abstract results you get! Never be afraid to try this, that’s what the “undo” button is for 😊
If you’re feeling really adventurous give it a go with the Distort->Liquify filter for wavy patterns. If you’re working with a 12×12 file I’d recommend that you set the Brush Size to no less than 800 and the Pressure should be set to 100. Then just click and drag the cursor around (not continuously) in multiple spots until you see something that works for you. Use the Revert button to start over.

Creativity is inventing, experimenting, growing, taking risks, breaking rules, making mistakes and having fun. – Mary Lou Cook
Thanks for reading this week’s Tuesday Tip. Remember, if you have any suggestions or questions please don’t hesitate to “Message Me”. Check back next week for tips about stroke placement. Click “Follow Me” to stay in touch. I hope you have a wonderful week!